In this blog, we are going to cover Azure Services called Microsoft Azure StorSimple Virtual Array
Microsoft Azure StorSimple Virtual Array is hybrid file server solution where your local file server is extended in Azure Cloud
It is a combination of local disk storage with extension to Azure storage.
For Example
- 5 Tb Provisioned locally = 37 Tb total usable size presented on local file server
- 8 Tb Provisioned locally = 64 Tb Total usable size presented on local file server
StorSimple appliance will use local drives to cache data and move other connect to Azure.
This process is completely transparent to users. Users will see share like any other share.
Azure StorSimple is just expanding seamlessly local file server space in Azure Cloud.
Price
For our case scenario (3.7 Gb File Server) price has three components
- StorSimple Appliance 152 CAD/month
- Storage for 4 Tb 141 CAD/Month
- Download Bandwith for 1 TB 100 $/month . This is a just estimate. Inbound bandwidth to Azure is free.
Running 3.7 Tb file server will cost you around 400 $ CAD/month. In that price, Azure Backup is included.
For our maximum, possible configuration (64 Tb) price has also three components
- StorSimple Appliance is 152 CAD/month
- Storage for 64 Tb is 2200 CAD/Month
- Download Bandwith for 10 TB is 1000 $/month . 10 Tb is a just estimate. Inbound bandwidth to Azure is free.
For the local 64 Tb file server will cost you around 3500 $ CAD/month. In that price, Azure Backup is included as well.
Provision 3.7 Tb File Server
In our example, we will provision local file server with a total usable size of 3.7 Tb using a combination of local storage and Azure storage.
Those are steps you will need to setup StorSimple Virtual Array on your local network.
- Create StorSimple Virtual Array service with Azure Storage Account
- Download and provision Hyper-V or VMware image on the local
- Register local VM with Azure Service
- Create File Server and shares
- Start using in as a regular file server.
We will need to add some local data drive to local VM.
Local data drive on this VM has to have a size of in range from 500 Gb to 8 TB.
Create a SureStore service
Using your Microsoft account credentials, log on to the Azure portal at this URL: https://portal.azure.com
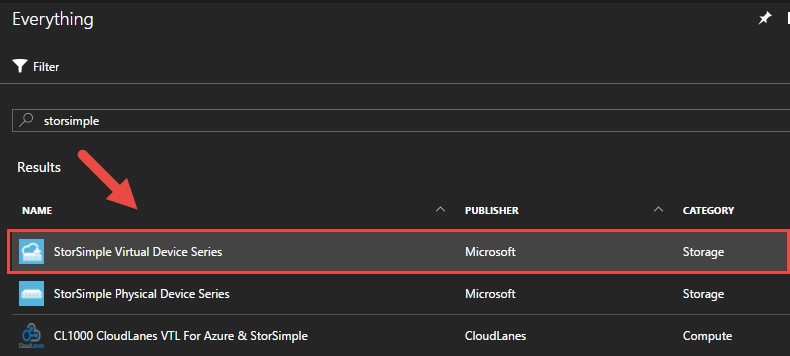
In the Azure portal, click + New > Storage > StorSimple Virtual Device Series.
In the StorSimple Device, Manager blade type a resource, location and storage account name for your service.
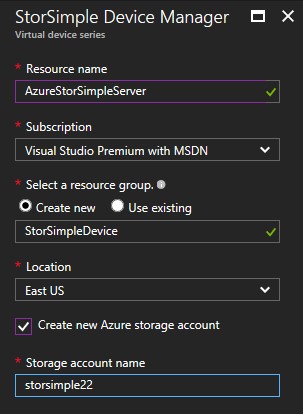
Click Create to create the StorSimple Device Manager.
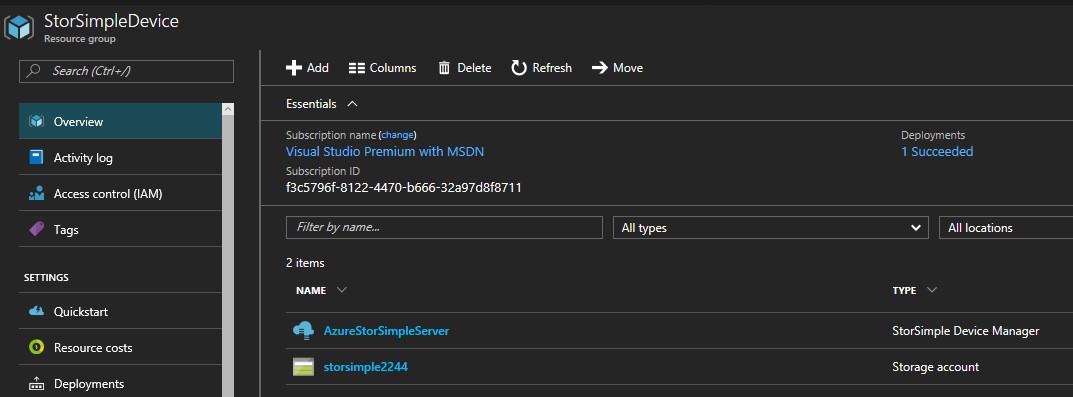
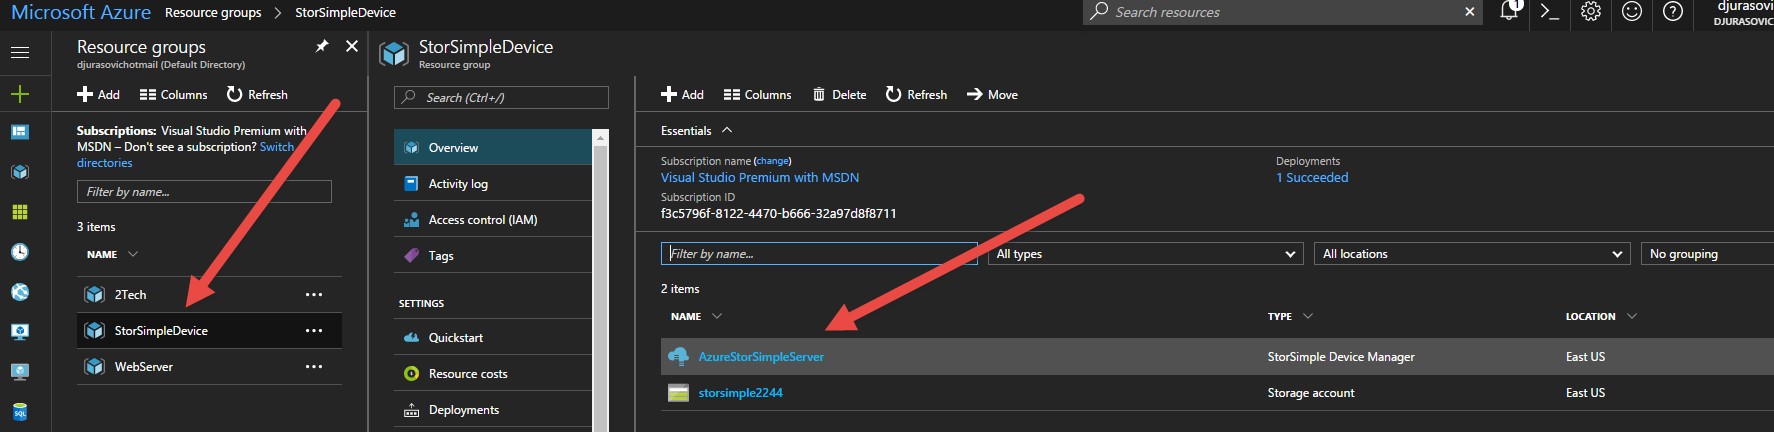
Navigate to your Resource Group, and you will see newly created StorSimple Device Manager and Storage account.
Download and provision Hyper-V or VMware image on the local server.
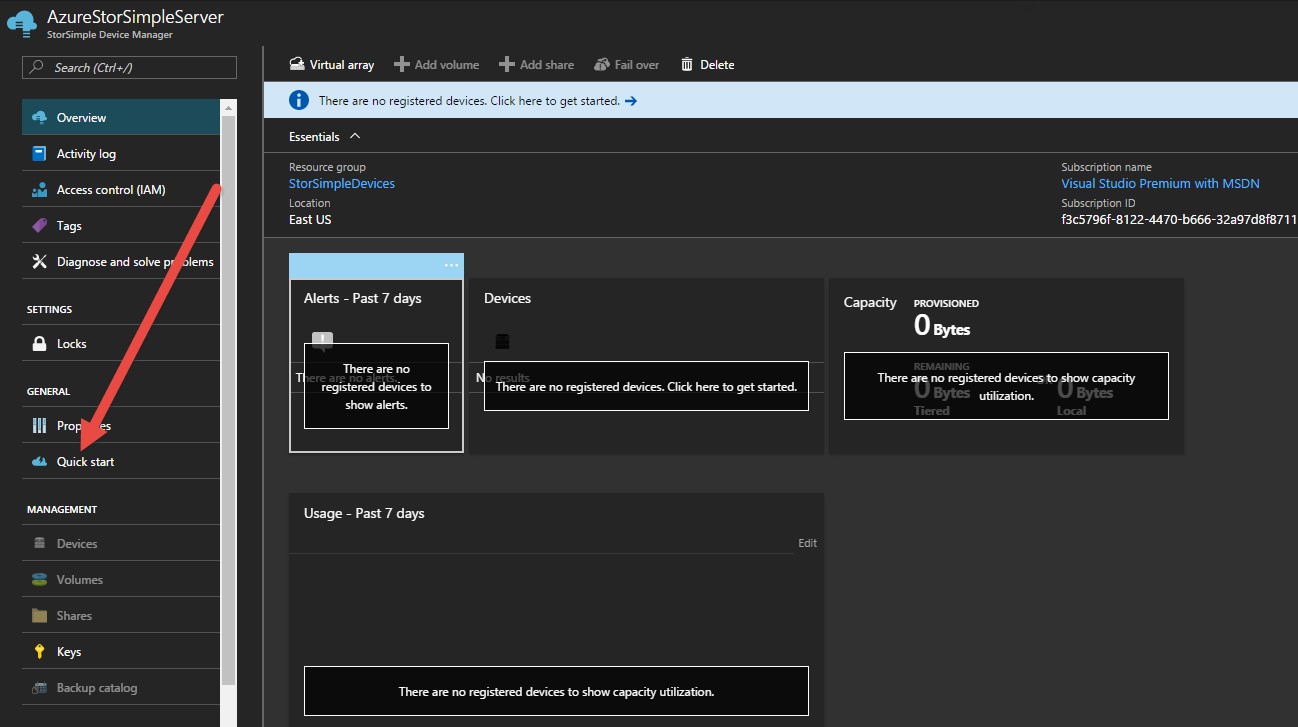
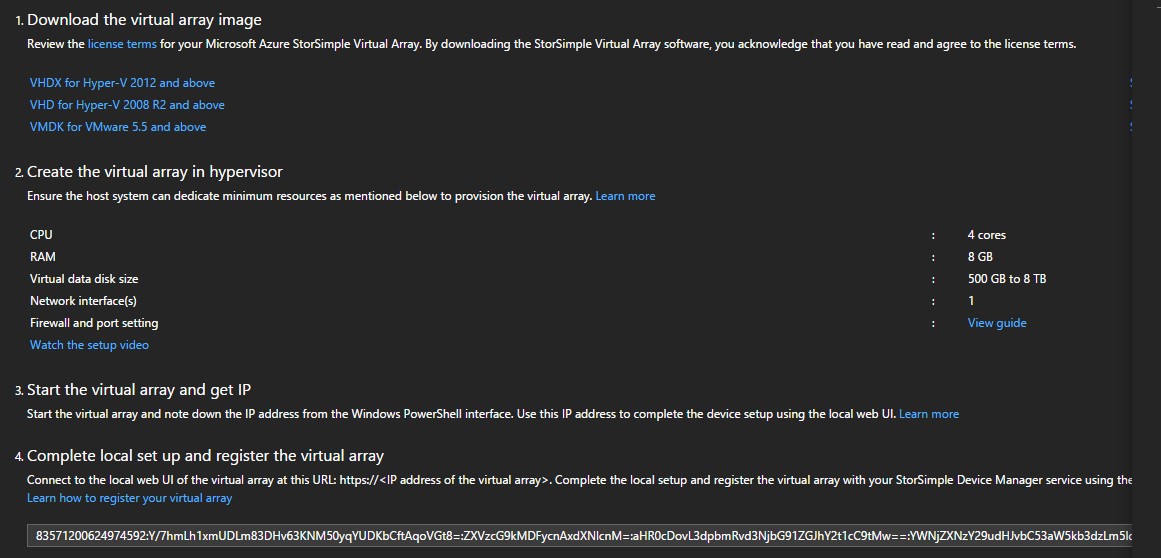
We will need to download the virtual array image to provision a virtual array on your host system. The virtual array images are operating system specific and can be downloaded from the Quick Start page in the Azure portal.
In the Azure portal, click Browse > StorSimple Device Managers.
Select an existing StorSimple Device Manager service. In the StorSimple Device Manager blade, click Quick Start.
Click the to the image that you want to download from the Microsoft Download Center. The image file is approximately 5 GB.
We will be using Hyper-V server, and we downloaded file to Hyper-V server, unzip the file to a local drive
Provision Virtual array local y on your Hyper-V server
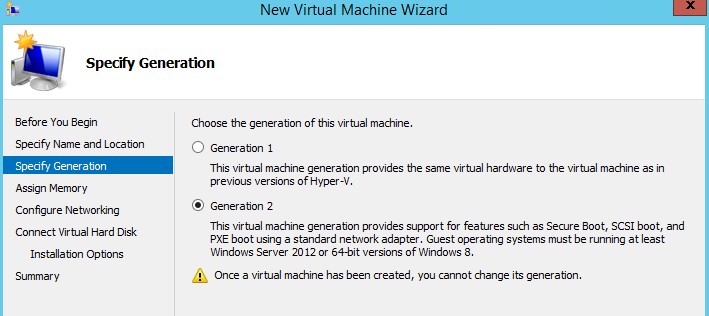
After download, we will need to provision VM. Run New Virtual Machine Wizard.
On new Machine, wizard chose Create Generation 2.
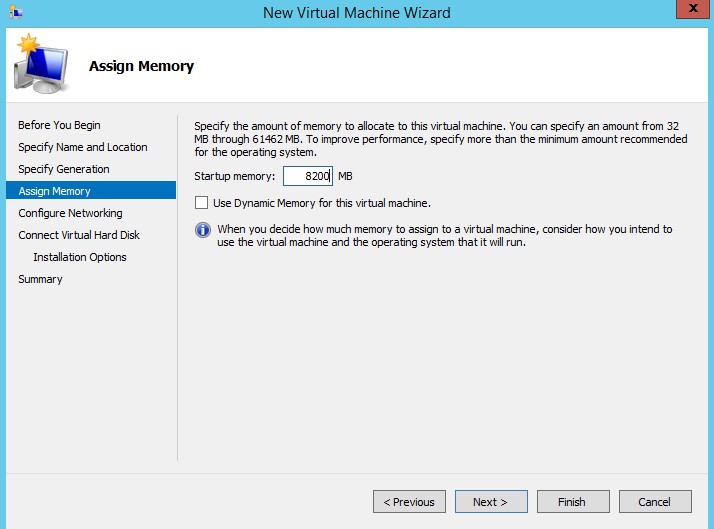
Add a minimum of 8 Gb or RAM and Do Not use Dynamic Memory.
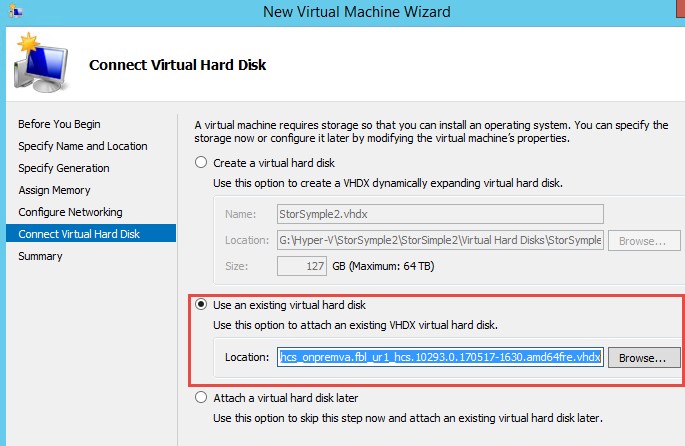
For Virtual Drive use file you downloaded in the previous section from Azure Site.
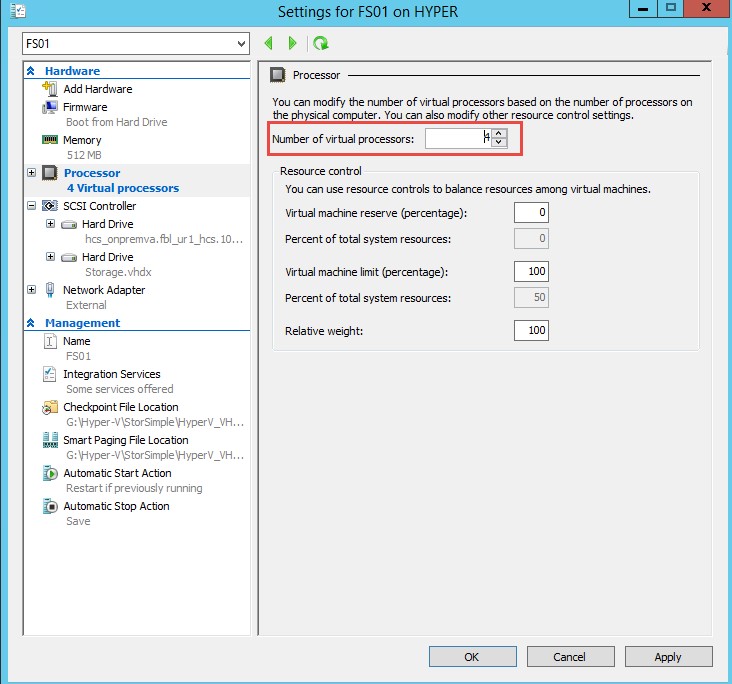
At this moment do not start system, open properties on VM and increase the number of Virtual CPU to 4
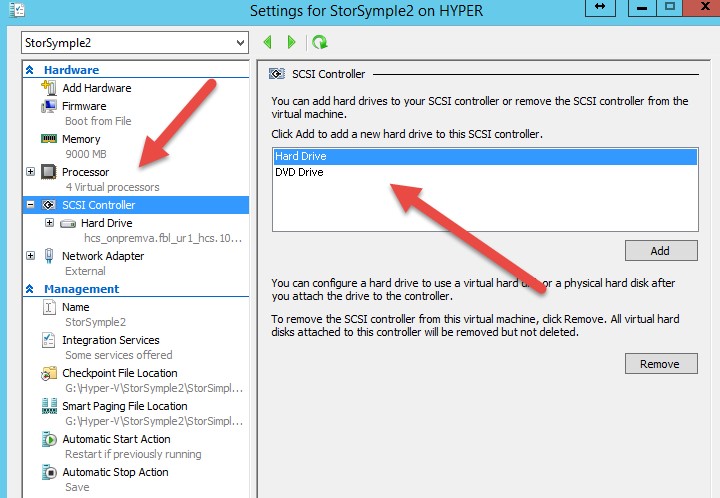
Also, one of the requirements to add additional data drive
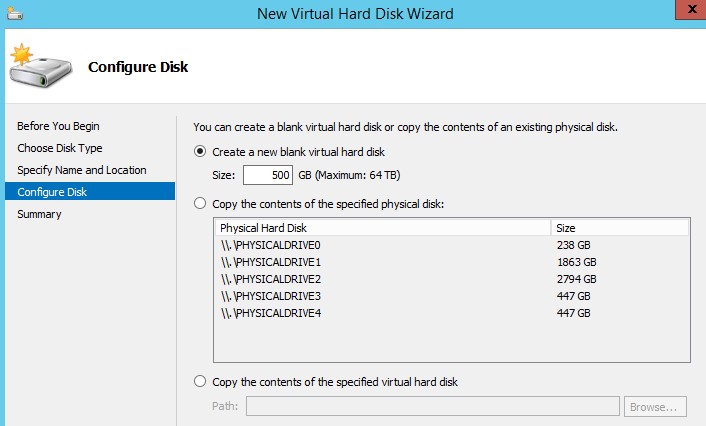
Add new SCSI Disk and specify the size to be from 500 Gb to 6.5 TB.
Total usable size on file server will be around 8 times larger than the size of this drive.
On the next screen chose Dynamically Expanding Virtual drive.
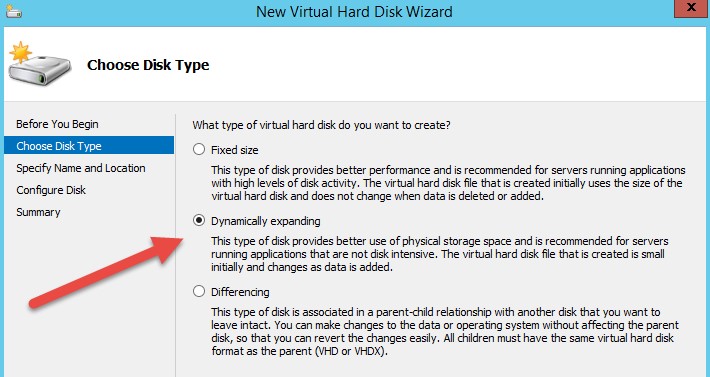
We will be adding 500 Gb drive in our configuration.
Click Next and finish VM provisioning wizard
You may have to wait 10 minutes for the device to be ready.
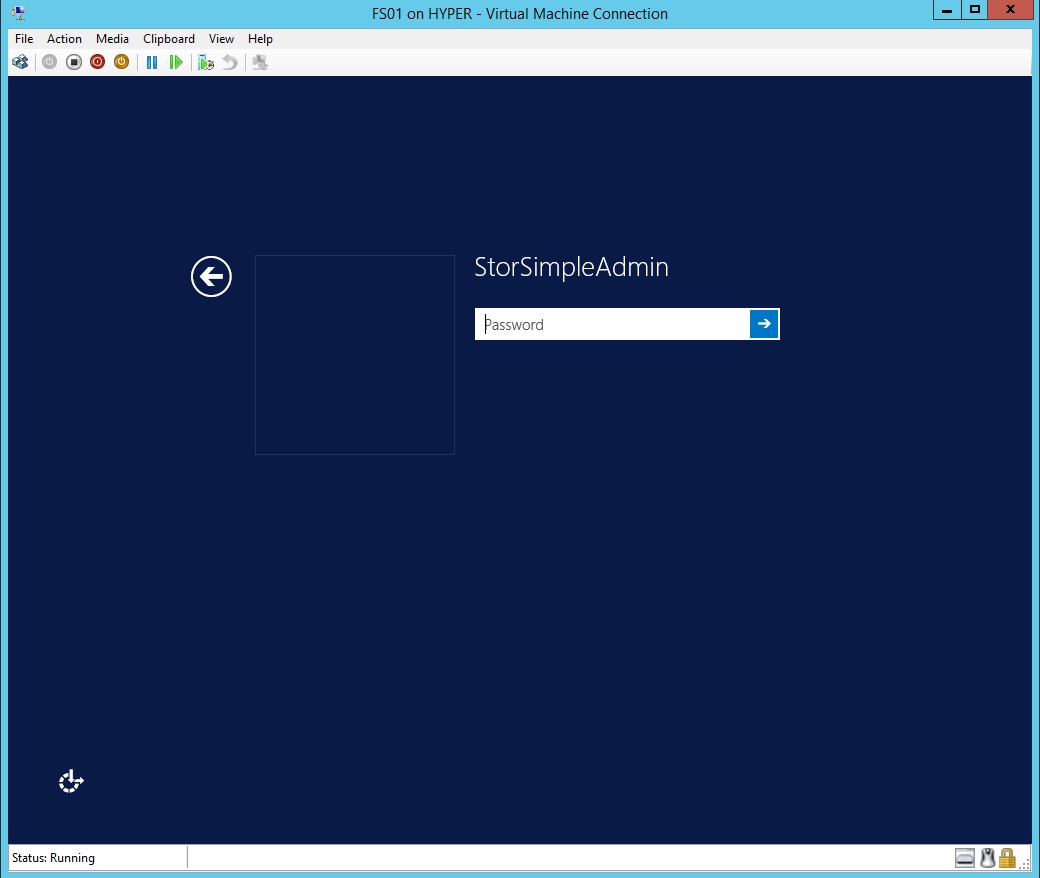
After the device is ready, go to Action. Press Ctrl + Alt + Delete to log in to the virtual array.
The default user is StorSimpleAdmin and the default password is Password1.
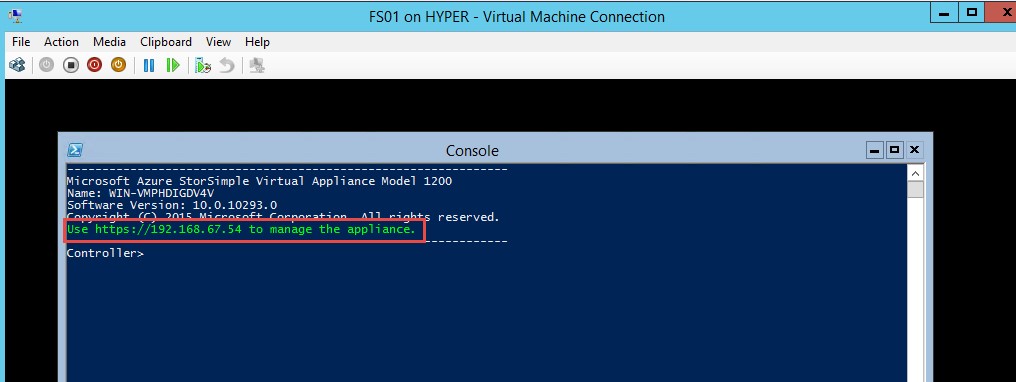
After you log in, you will be presented with hyperlink and IP (DHCP) what you need to
use to manage the device.
After you successfully login navigate to network settings and disable DHCP and assign IP address manually.
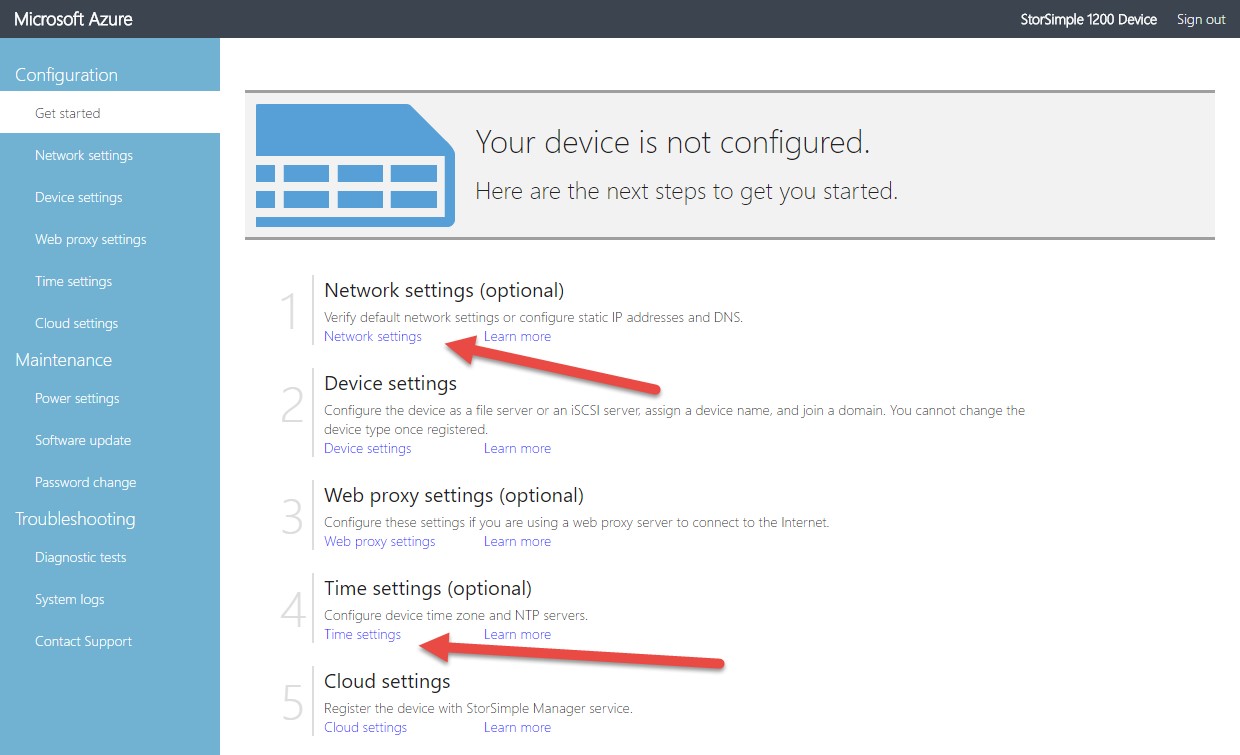
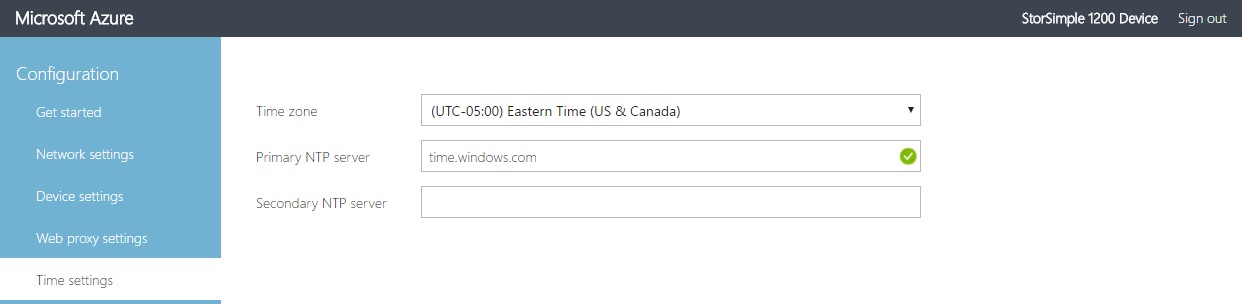
Navigate to Time settings and change the time zone.
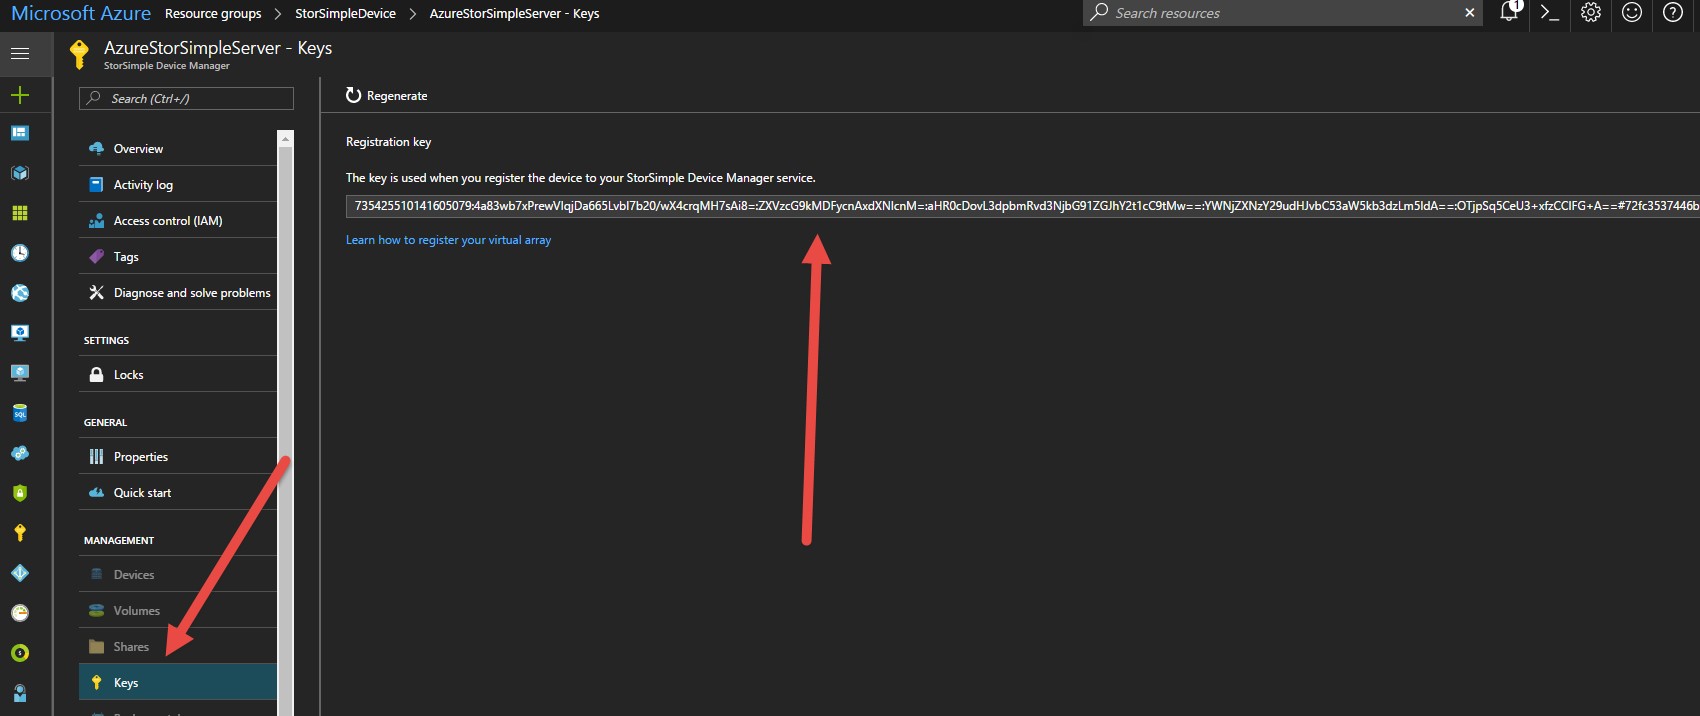
Get the service registration key
After the StorSimple Device Manager service is up and running, we will need to get the service registration key. This key is used to register and connect your StorSimple device with the service.
To get the StorSimple service registration key follow those steps in Azure Portal
On the StorSimple Device Manager blade, click the service that you created. This opens up a new blade to the right.
In the blade that opens up, click Manage > Keys.
Click the Copy icon to copy the service registration key
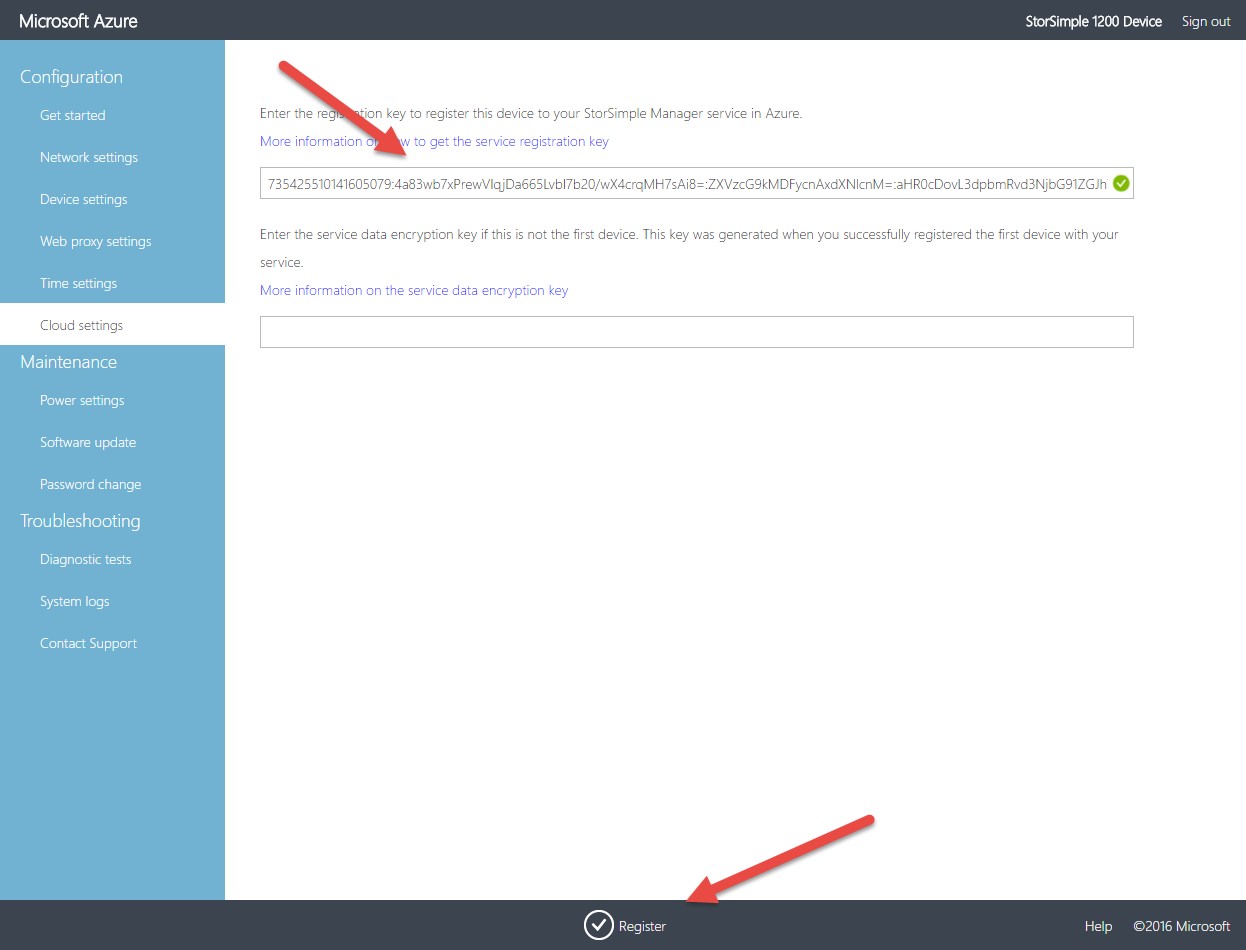
Come back to your local device and under cloud settings paste key and press register.
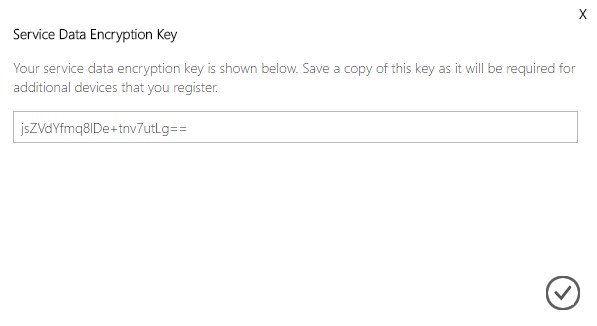
After you press register you will be prompted to save service data encryption key for the additional device you might setup.
Setup Device File Server
On next step, we will explain how to setup Device File Server on the local network.
We will be setting File server called FS01 and we will join a server to AD domain 3tech.ca.
Navigate to Device Settings and fill up the following settings from the figure.
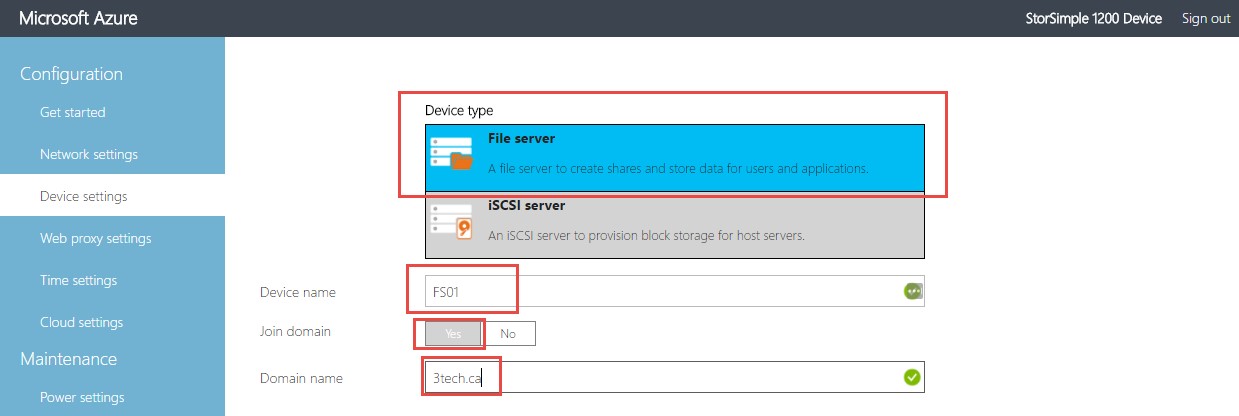
Press apply and after that return to Azure Portal
Select your StorSimple Device Manager service and then navigate to Management > Devices. In the Devices blade, verify that the device has successfully connected to the service and has the status Ready to set up.
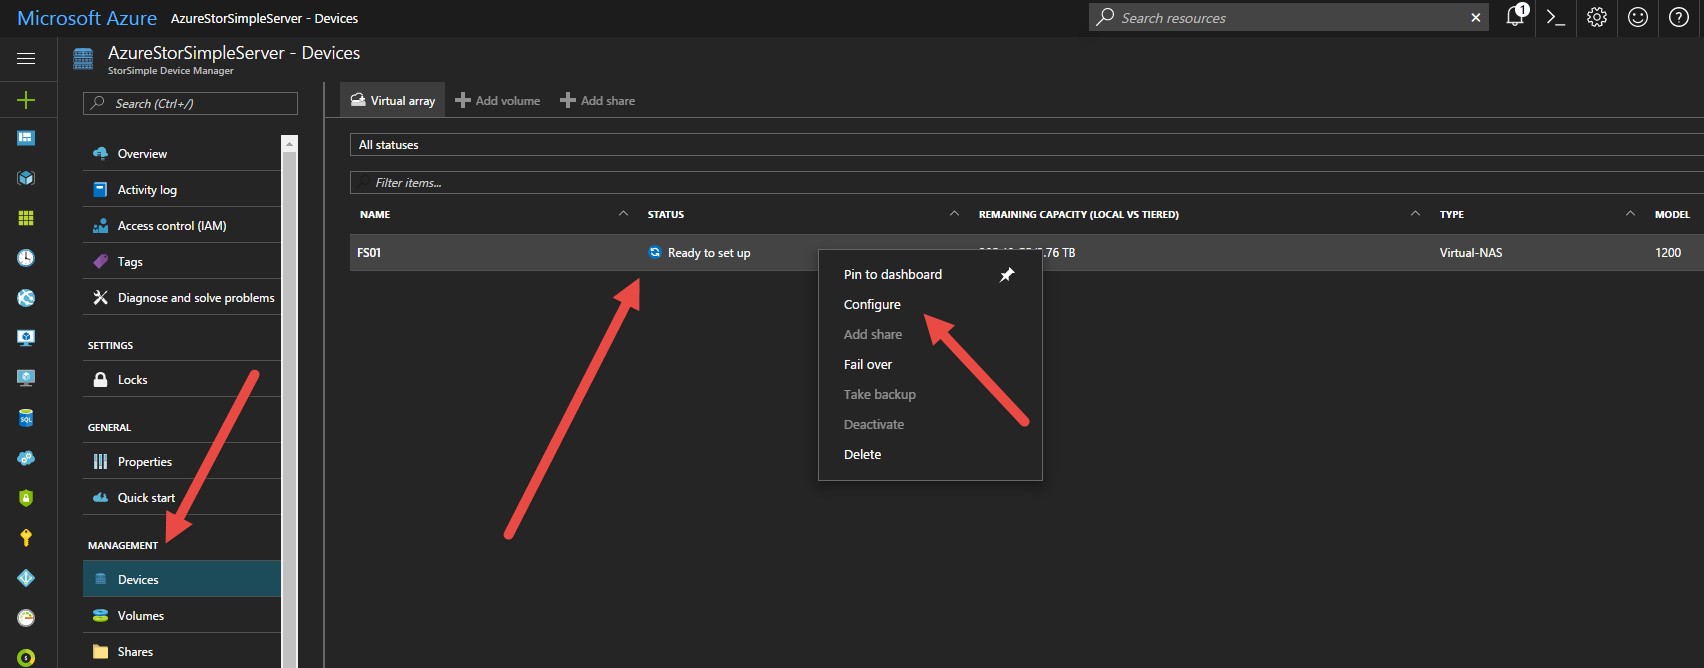
Click on Device and click Configure on the command bar.
The new blade will open and you will be presented with new settings.
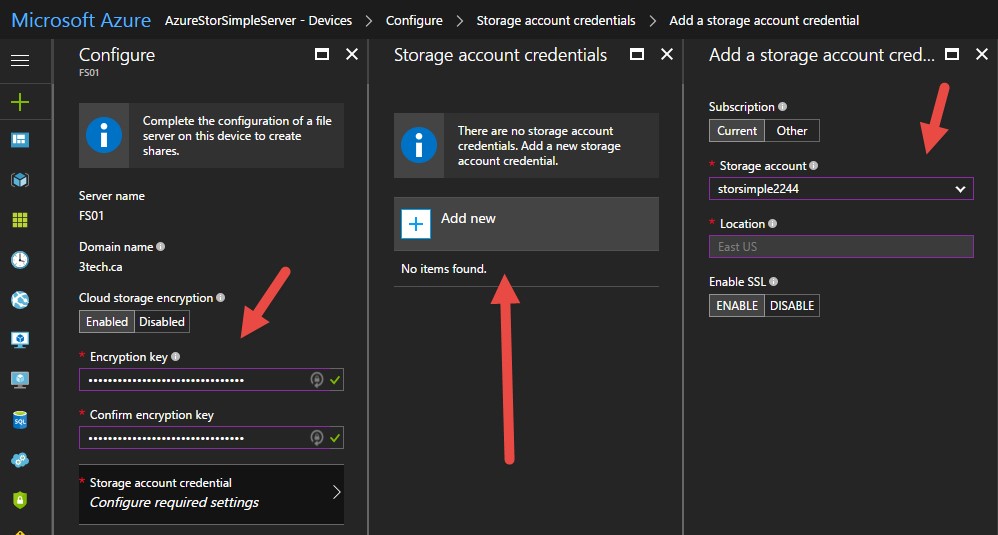
The file server name is already populated.
Be sure the cloud storage encryption is set to Enabled. This will encrypt all the data that is sent to the cloud
A 256-bit AES key is used with the user-defined key for encryption.
Specify any 32 character key and then reenter the key to confirm it.
Click Configure required settings to specify storage account credentials to be used with your device.
The device status will change to Online.

Add a share
Now we will create file share. All those settings are done on Azure and it is downloaded to the local StorSimple device.
In monitoring tab, you can see how much capacity you have.
So from 500 Gb local drive, we can use 3.7 Tb for total storage.
Select the file server device you configured in the last step and click Add share.
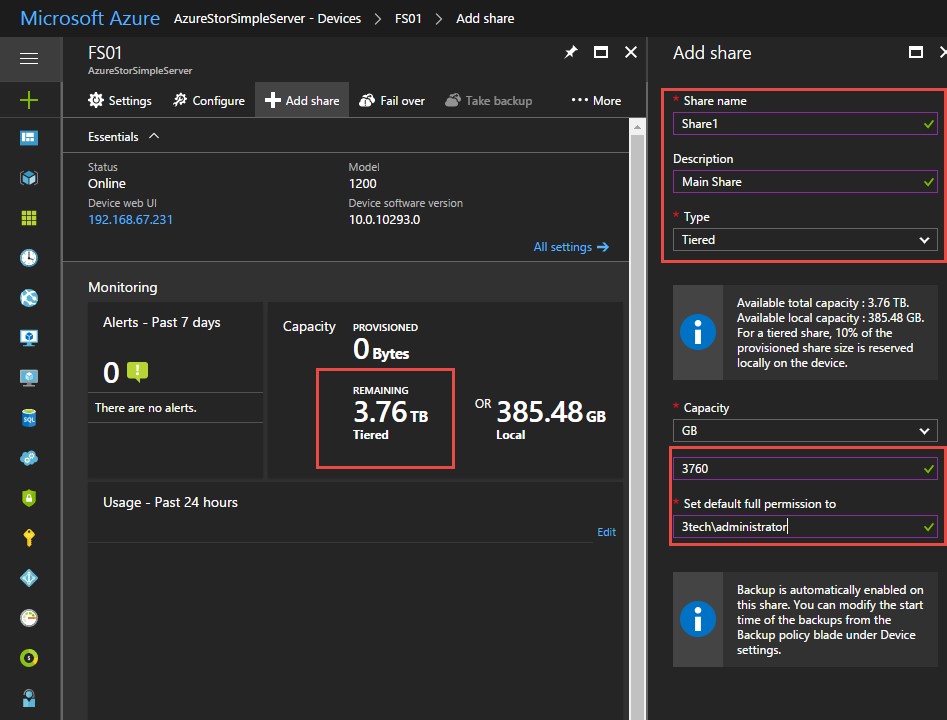
Specify the following share settings:
- A name for your share.
- A Type for the share. The type can be Tiered or Locally pinned.We will select a Tiered share.
- Capacity. We will map all available storage which is 3.7 Tb in our case.
- In the Set default full permissions to the field, assign the permissions the group that is accessing this share. After you have assigned the permissions here, you can then use File Explorer to modify these permissions.
Click Add to create the share.
Client Connect to the share
You will now need to connect to one or more shares that you created in the previous step. Perform these steps on your Windows Server host connected to your StorSimple Virtual Array.
To connect to the share, follow this procedure
In the Run window, specify the \\FS01\
System might ask you to log in with administrator account you specify in the previous steps
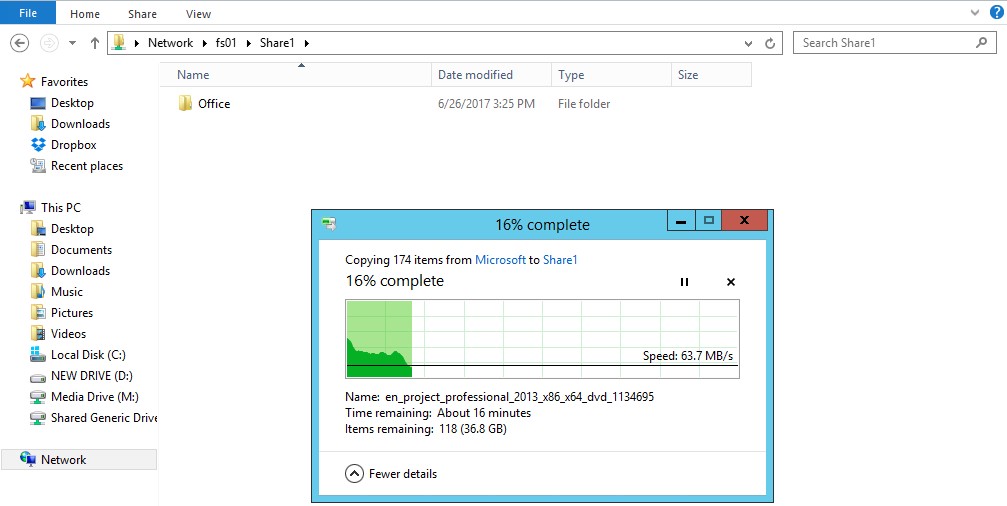
You will be presented with 6.4 Tb share. Now you can start copying data to file server.
hi,
Do you know how to migrate storage gateway (Aws) to storsimple (Azure)?