The Azure Site Recovery service contributes to your disaster recovery strategy by managing and orchestrating replication, failover, and failback of on-premises machines and Azure virtual machines (VMs).
This tutorial shows you how to set up disaster recovery to an Azure for Azure VMs.
In this tutorial, you learn how to replicate three local physical servers to Azure.
This is steps what we are going to follow:
Azure Preparation
Create a Resource Group
Create a storage account
Create a Recovery Services vault
Set up an Azure network
Prepare Recovery Services vault
Local on-premises server preparation and configuration
Create Service Account for Azure Configuration Server
Install and Configure on-premises Azure Configuration Server
Creating replication policy and configuring replication to Azure
Create a Replication Policy
Create a Replication Policy
Enable Replication
We will need to install a new Site Recovery configuration Server in on-premisses network .
A configuration server is an on-premises machine that runs Site Recovery components :
- configuration server
- process server
- master target server
Requirements for Site Recovery configuration server and Replicated machines
Azure Preparation
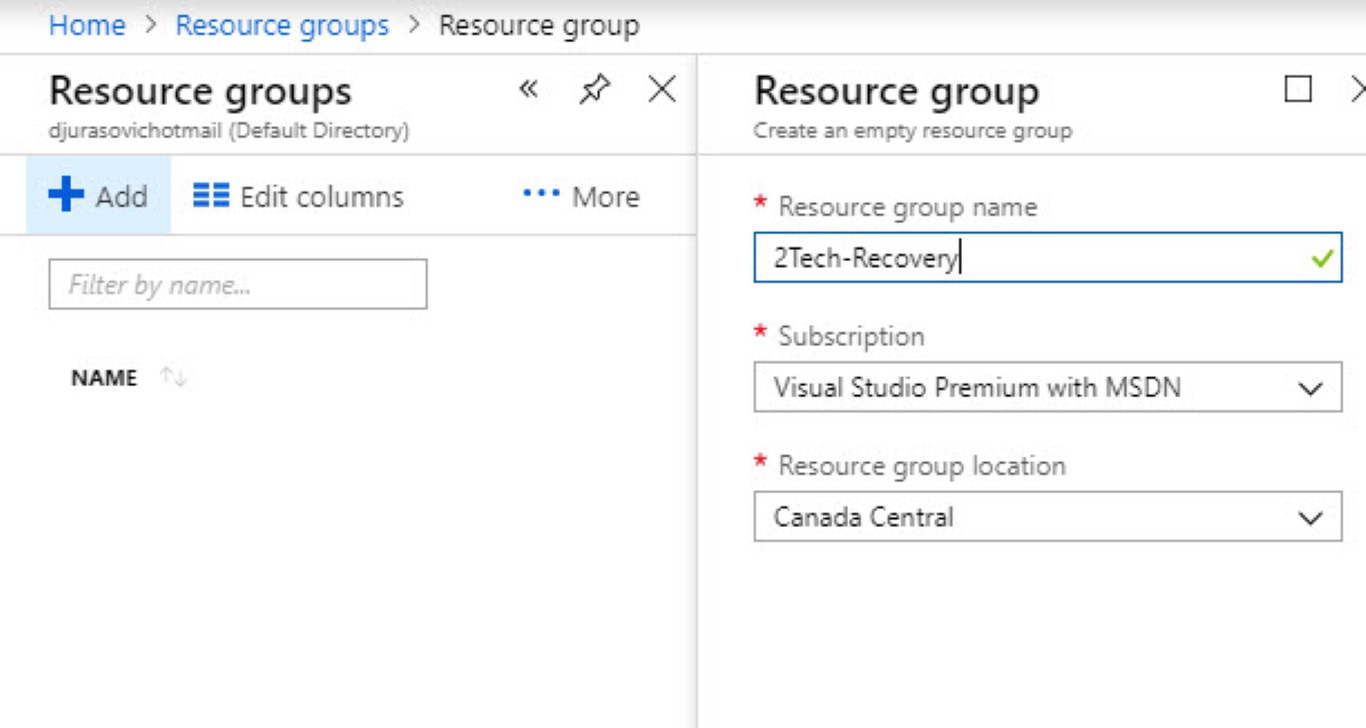
Create a Resource Group
On the Azure portal menu, select Create a resource >Resource Group
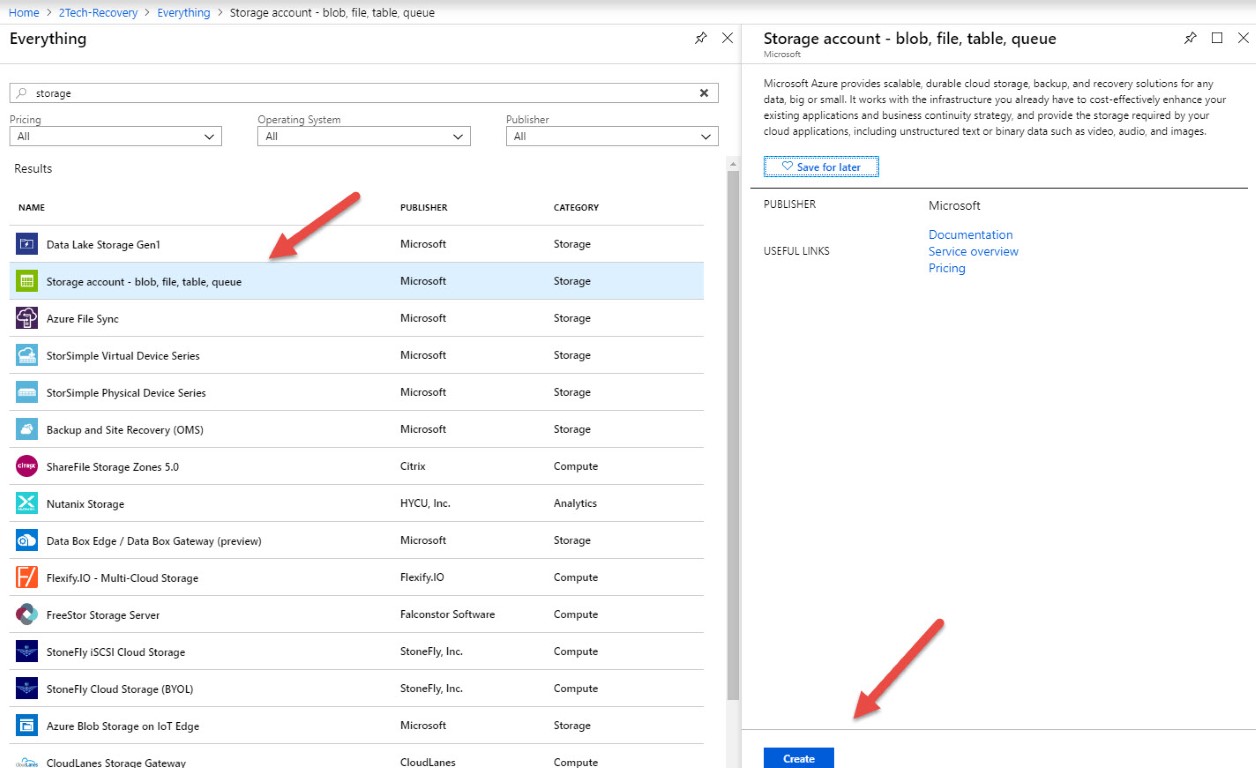
Create a storage account
On the Azure portal menu, select Create a resource > Storage > Storage account – blob, file, table, queue
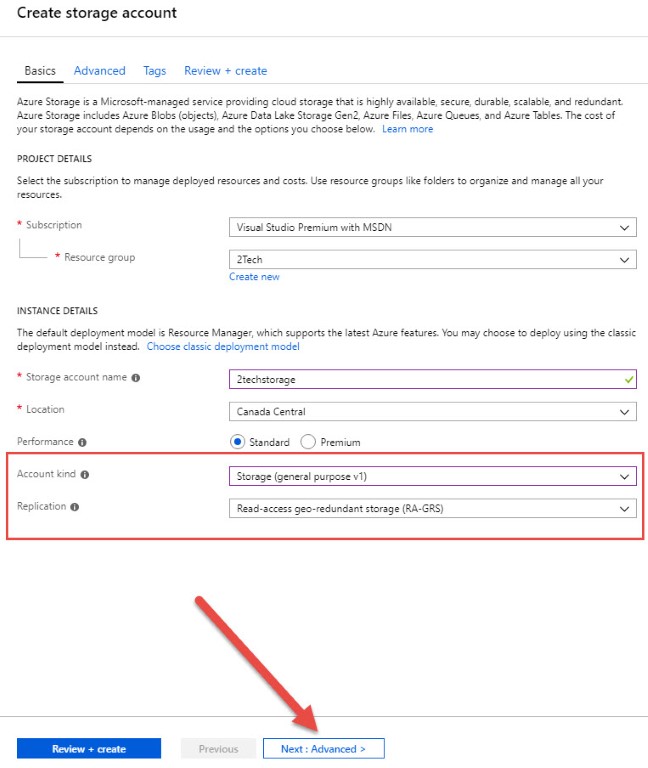
In Performance, select Standard
In Account kind, select Storage (general purpose v1).
In Replication, select the default Read-access geo-redundant storage for storage redundancy.
Click on Next: Advanced
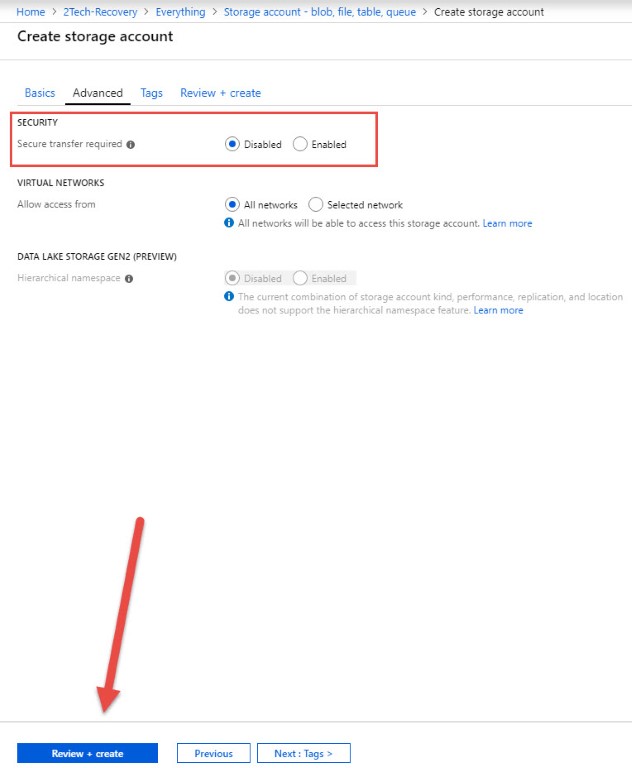
On advance Tabe , select Secure transfer required as Disabled.
Click Review + Create
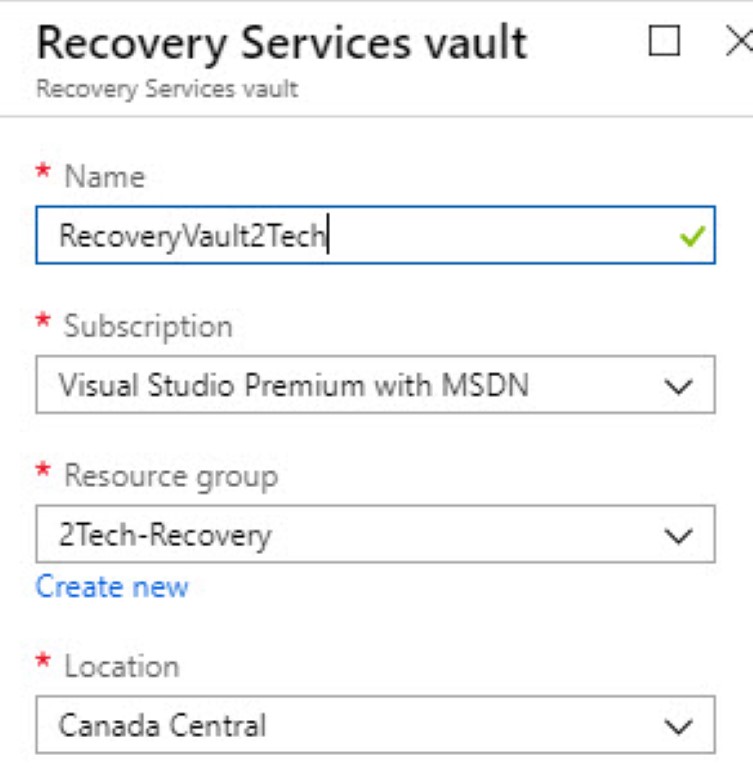
Create a Recovery Services vault
In the Azure portal, select Create a resource > Storage > Backup and Site Recovery (OMS).
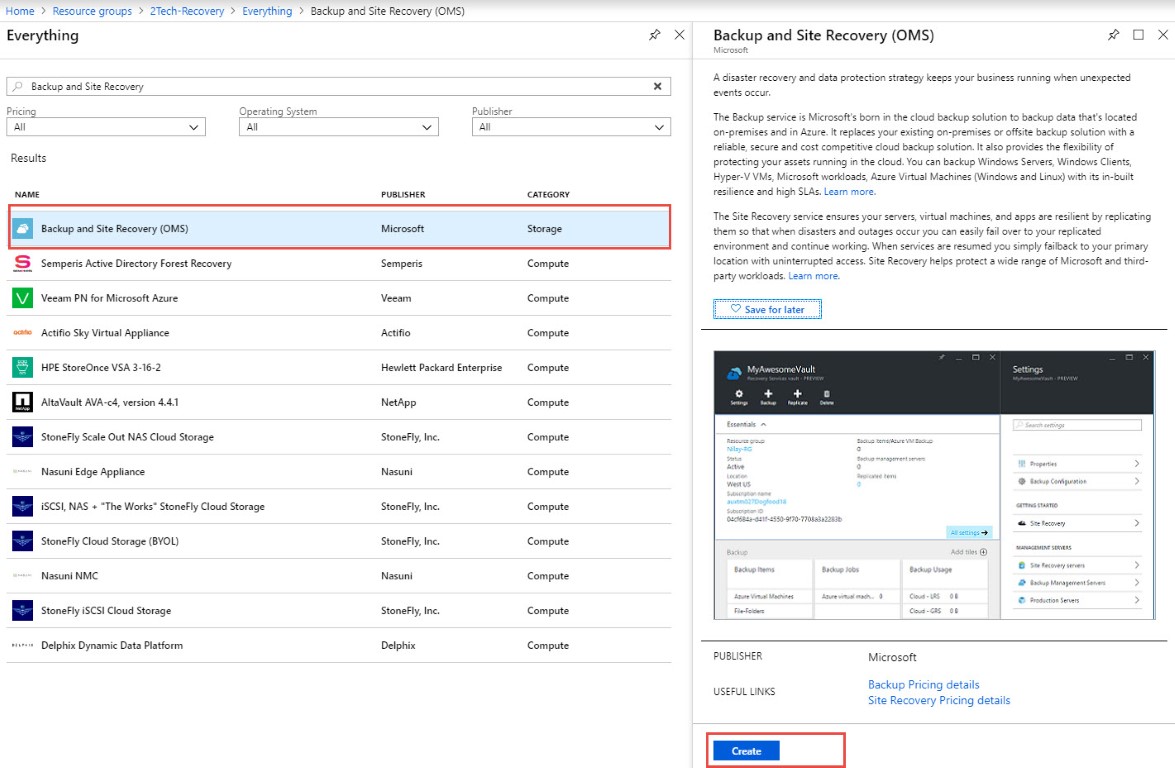
In Name, enter a friendly name to identify the vault.
In Resource group, Enter a name of your Resource Group
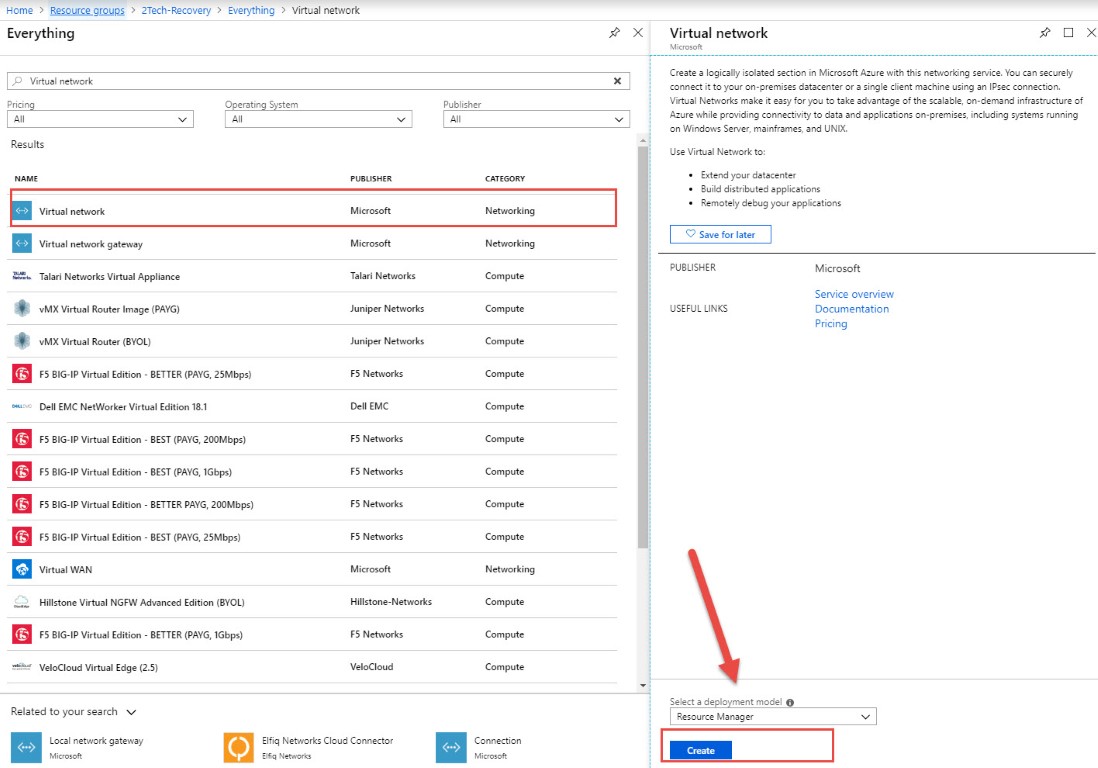
Set up an Azure network
When Azure VMs are created from storage after failover, they’re joined to this network.
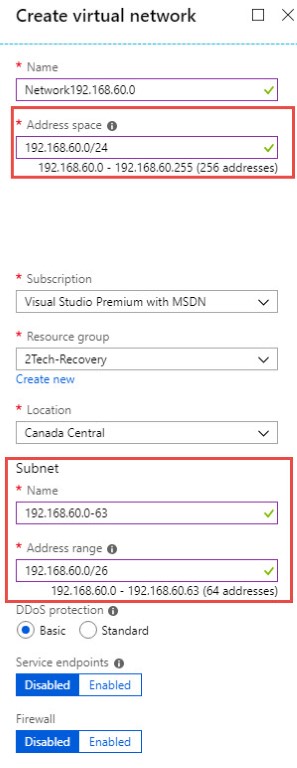
In the Azure portal, select Create a resource > Networking > Virtual network.
In Address Space, enter the range for the network 192.168.60.0/24.
With this address space, we can have 4 subnets. We are just going to use the first subnet for this demonstration
In Subnet Address Space enter 192.168.60.0/26
.
Prepare Recovery Services vault
In the Azure portal, navigate Recovery Services vault > Site Recovery Prepare Infrastructure > 1 Protection Goal
Choose a setting from the picture.
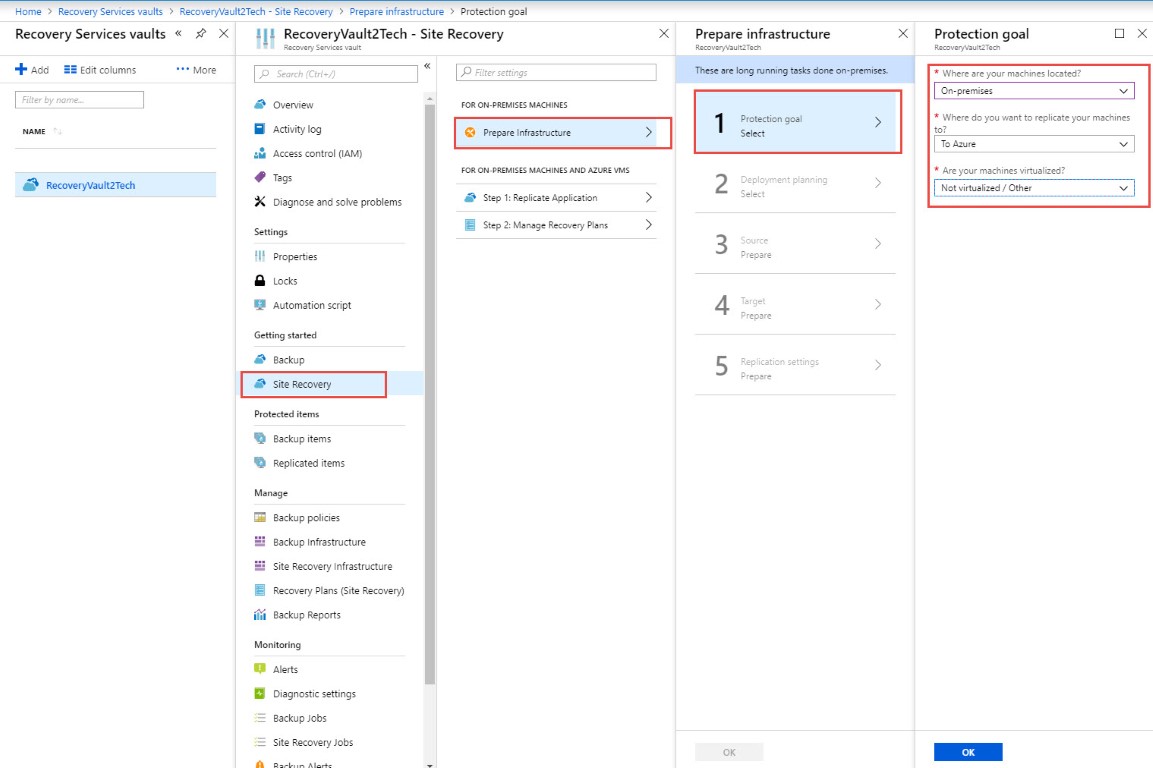
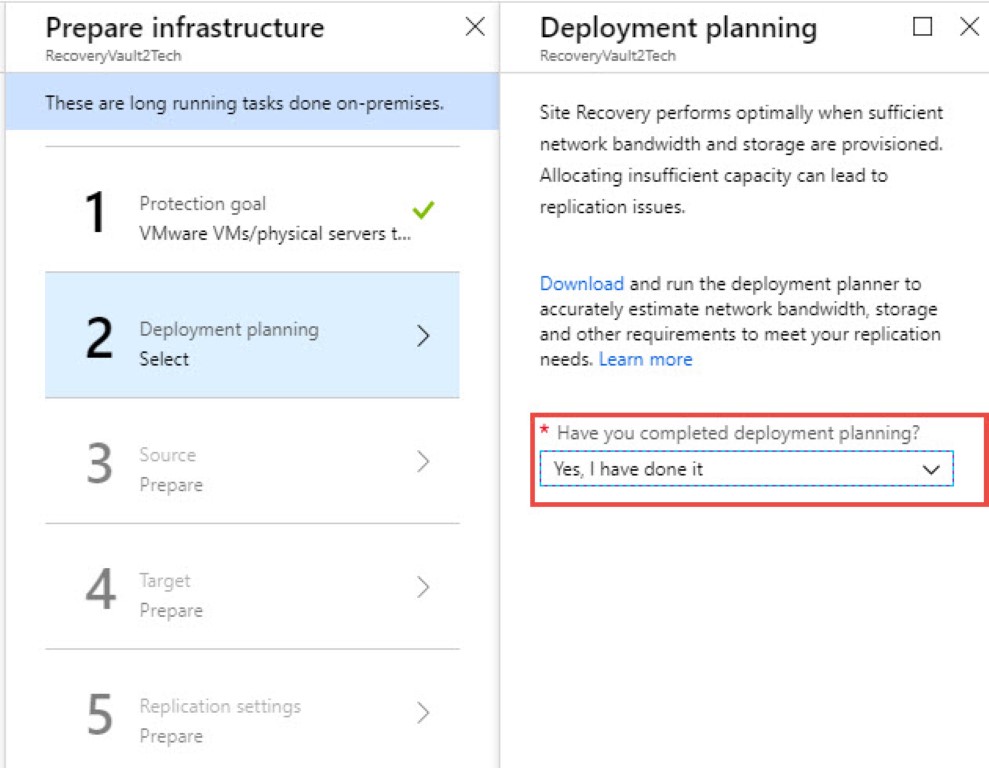
In the Azure portal, navigate Recovery Services vault > Site Recovery Prepare Infrastructure > 2 Deployment Planning
Choose a setting from the picture.
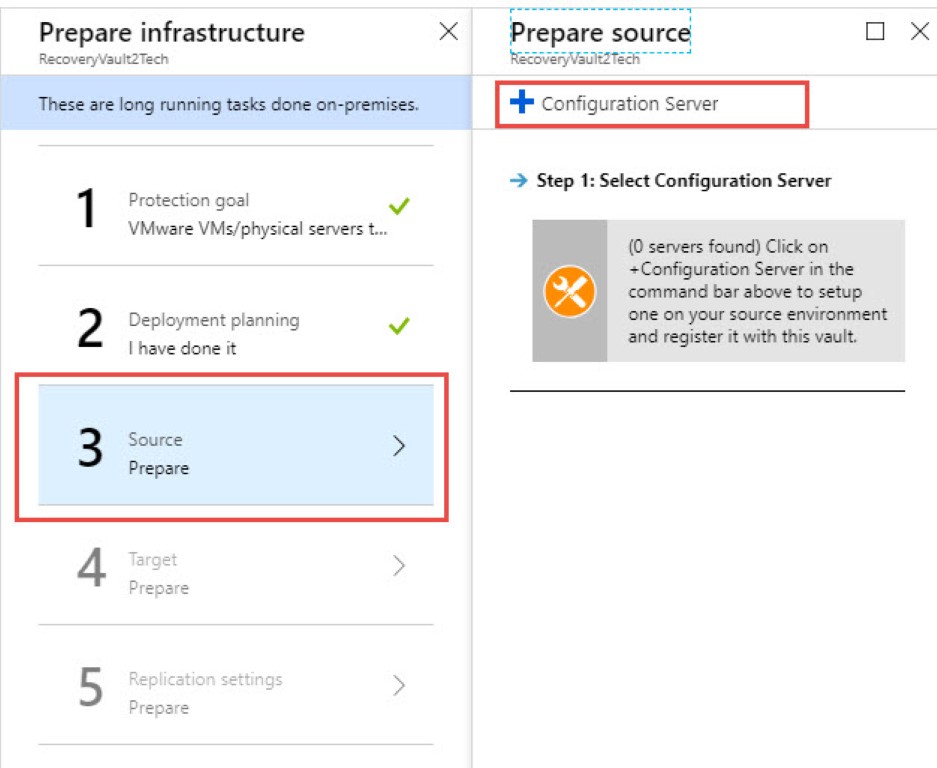
In the Azure portal, navigate Recovery Services vault > Site Recovery Prepare Infrastructure > 3 Prepare Source
Click Configure Server
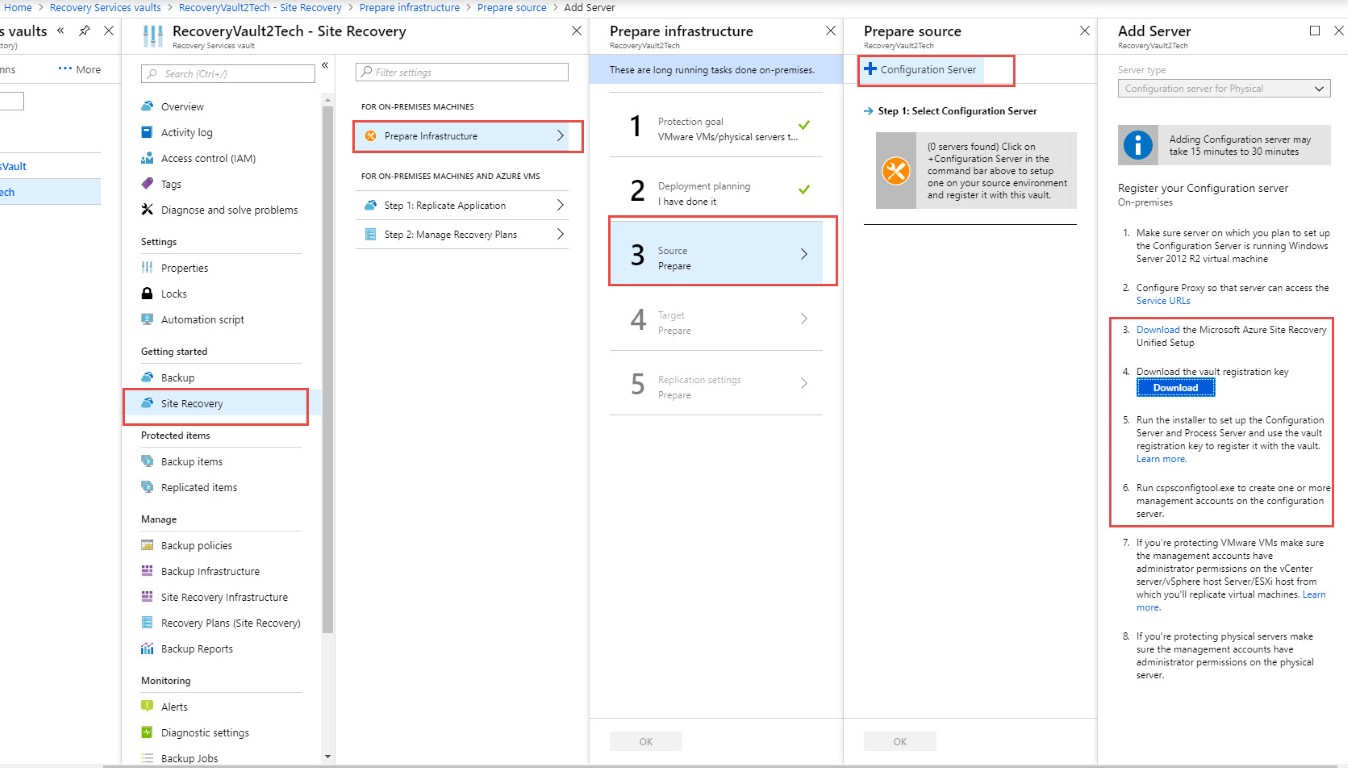
In the Azure portal, navigate Recovery Services vault > Site Recovery Prepare Infrastructure > 3 Prepare Source > Add Server
Download the registration key and Azure Site Recovery Setup to your Azure Configuration Server
![]()
Local on-premises server preparation and configuration
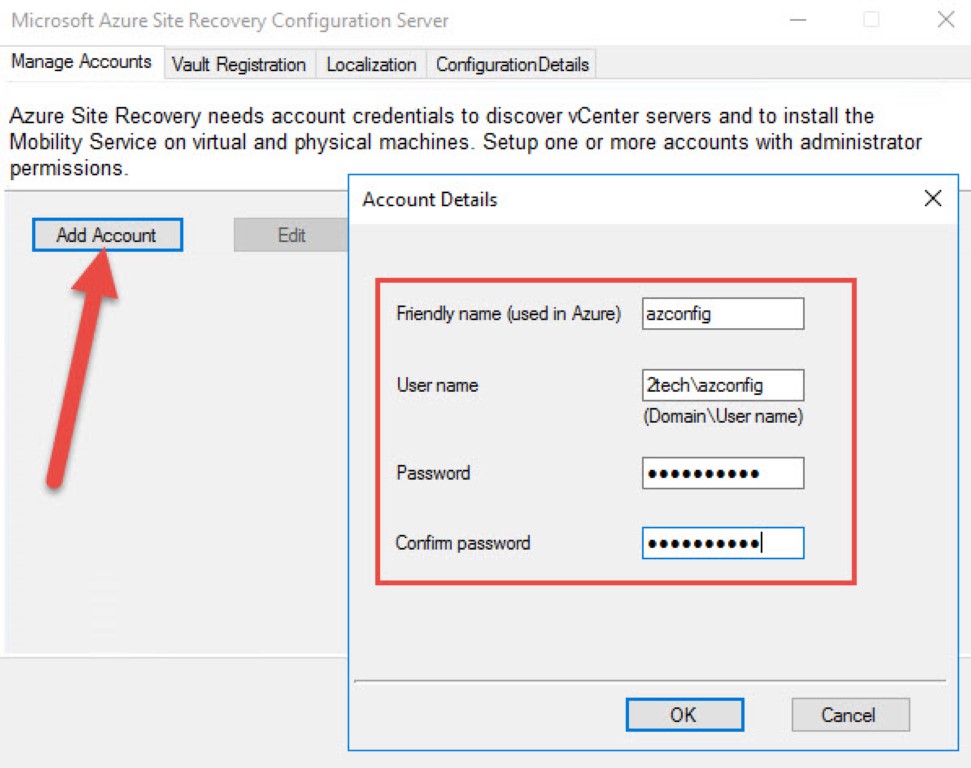
Create Service Account for Azure Configuration Server
Create AD User account and assign them to local administrators groups in each server you are going to replicate
In our case, we create an account named 2tech\azconfig
Install and configure on-premises Azure Configuration Server
Login to your on-premises Azure Configuration server Azure
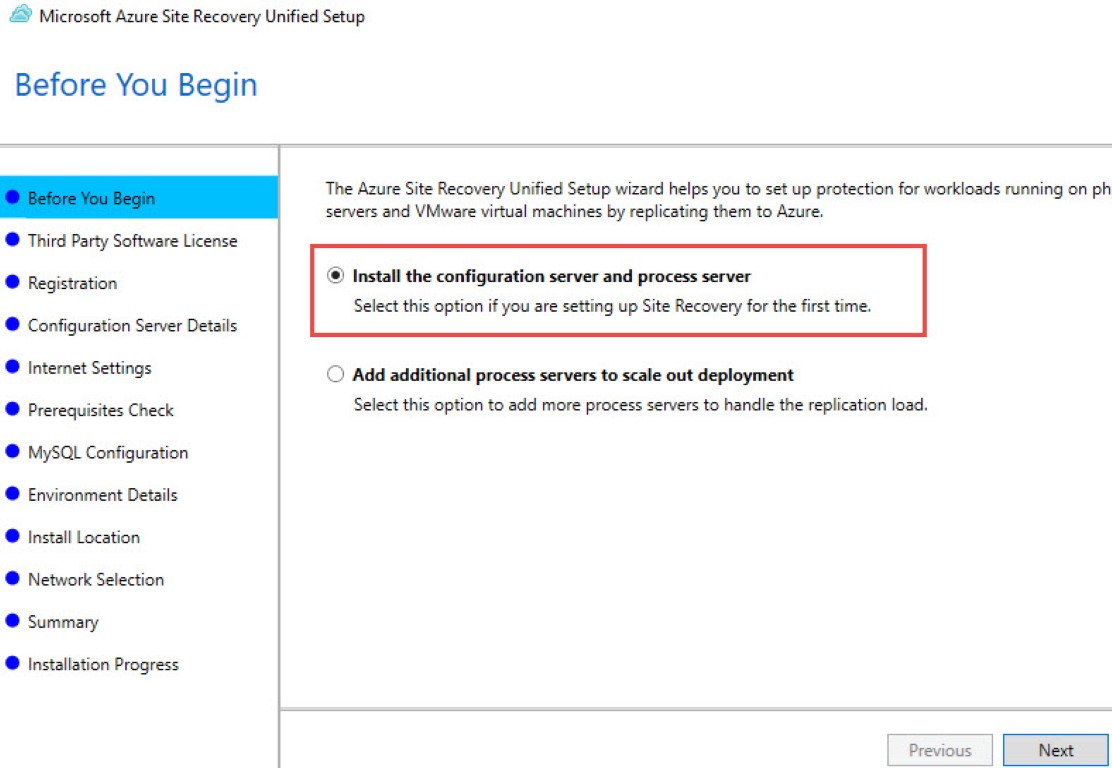
- Run the Unified Setup installation file.
- Select Install the configuration server and process server.
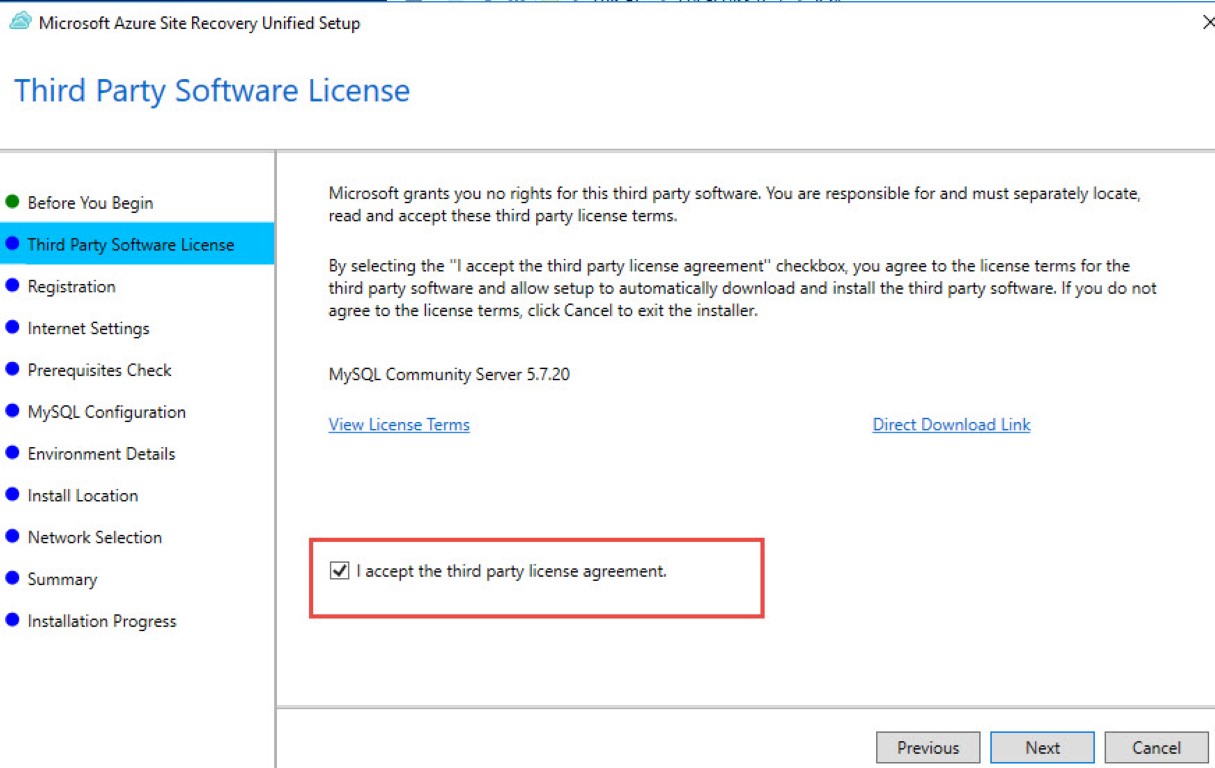
In Third Party Software License, click I Accept to download and install MySQL.
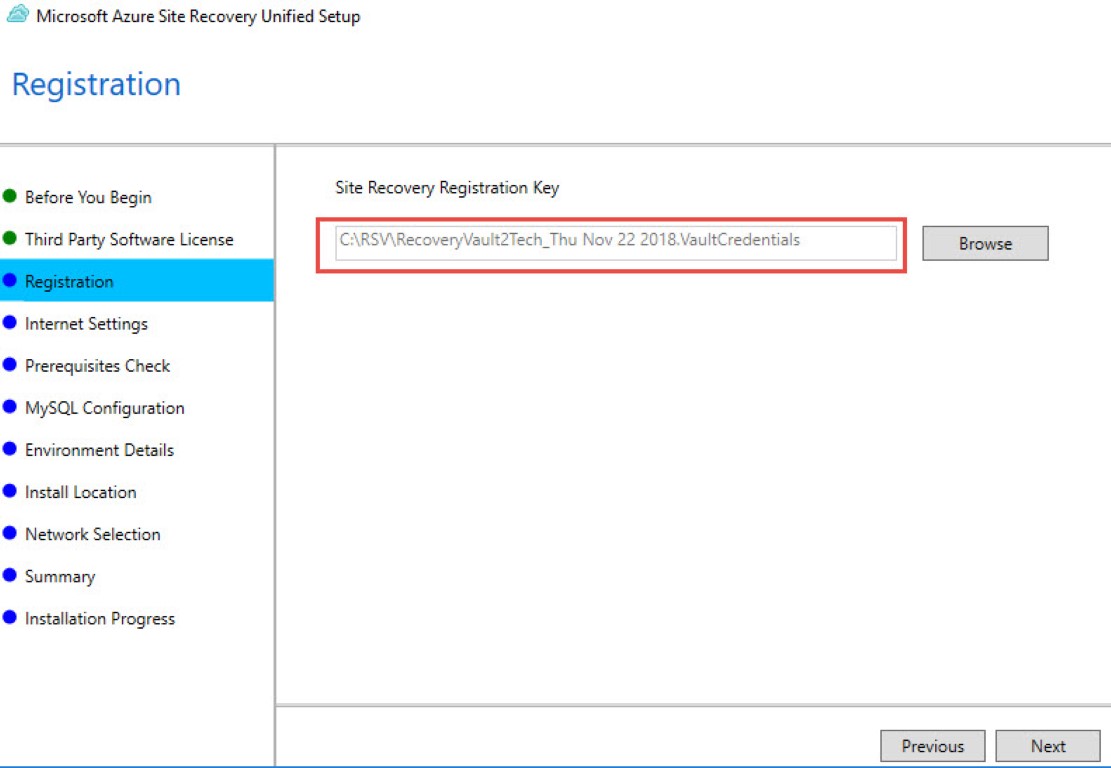
In Registration, select the registration key you downloaded from the vault.
Select Connect directly to Azure Site Recovery without a proxy server.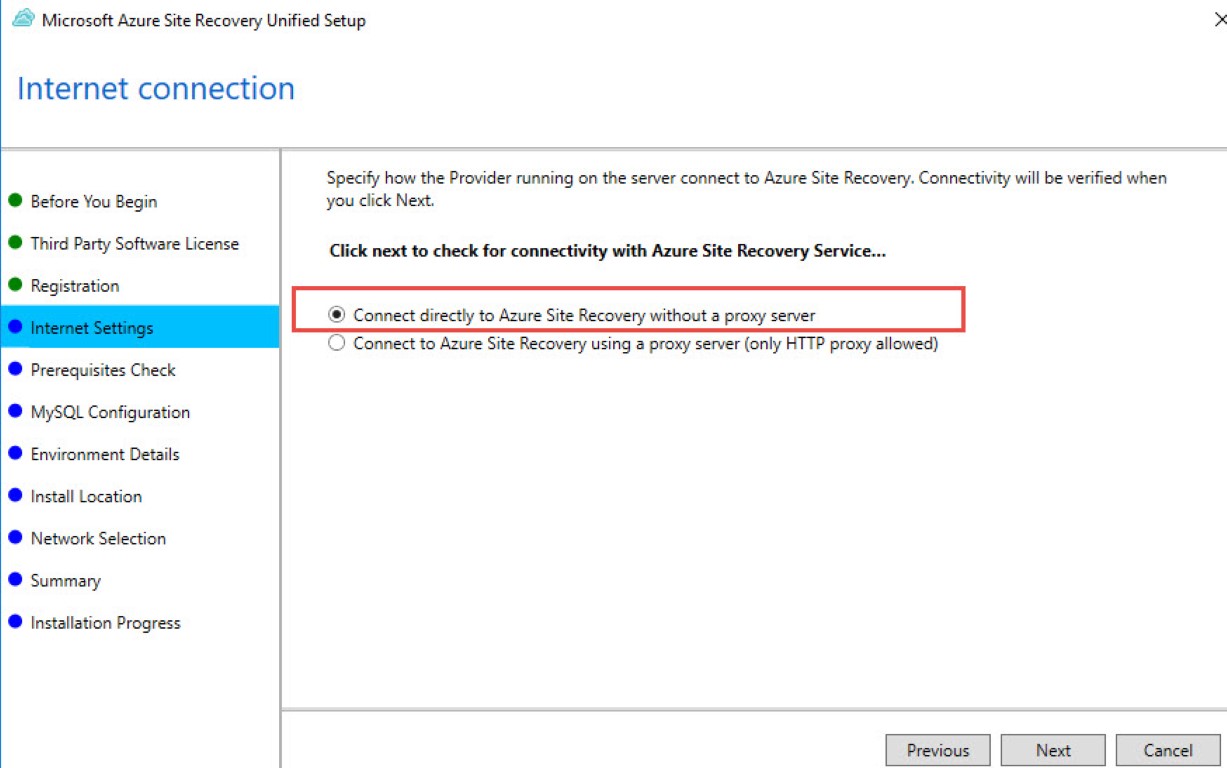
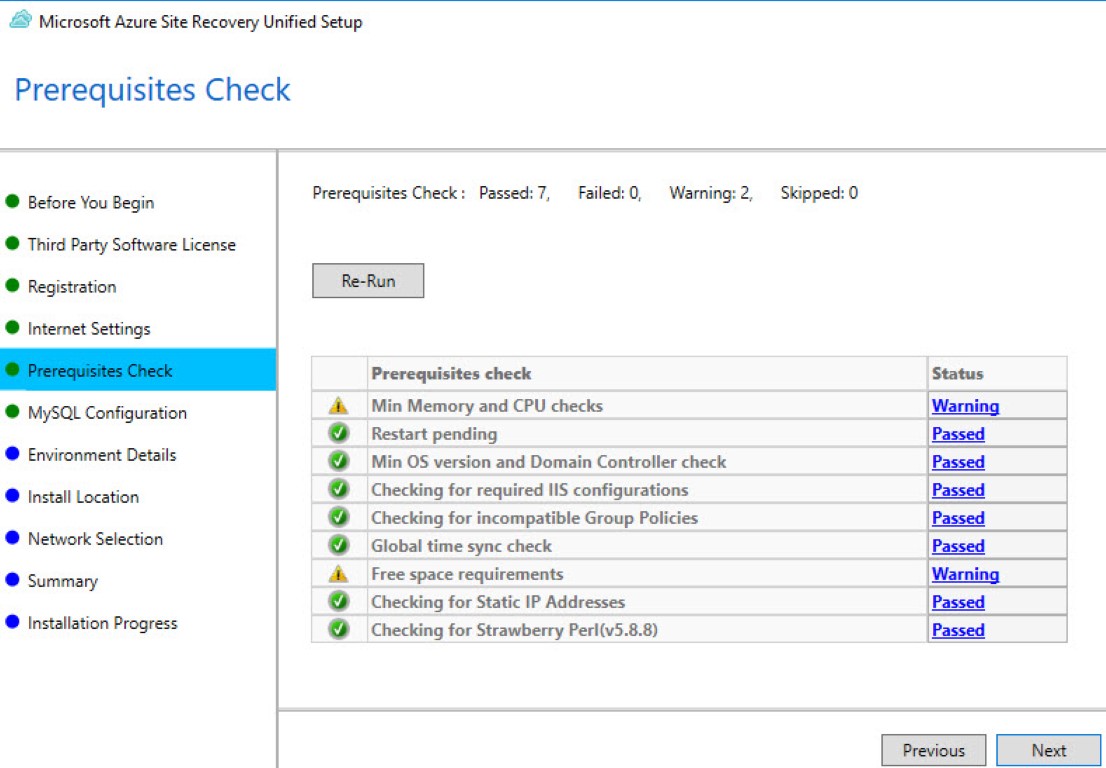
In Prerequisites Check, Setup runs a check to make sure that installation can run.
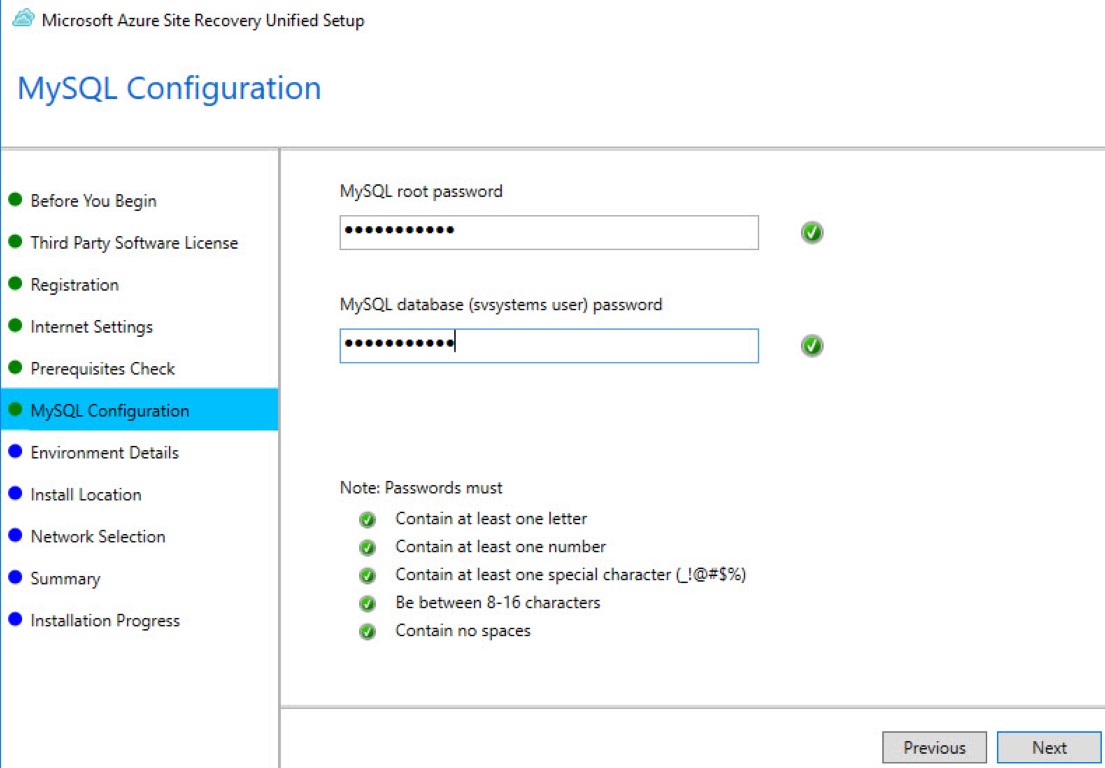
In MySQL Configuration, create MySQL root password for logging on to the MySQL server instance that is installed.
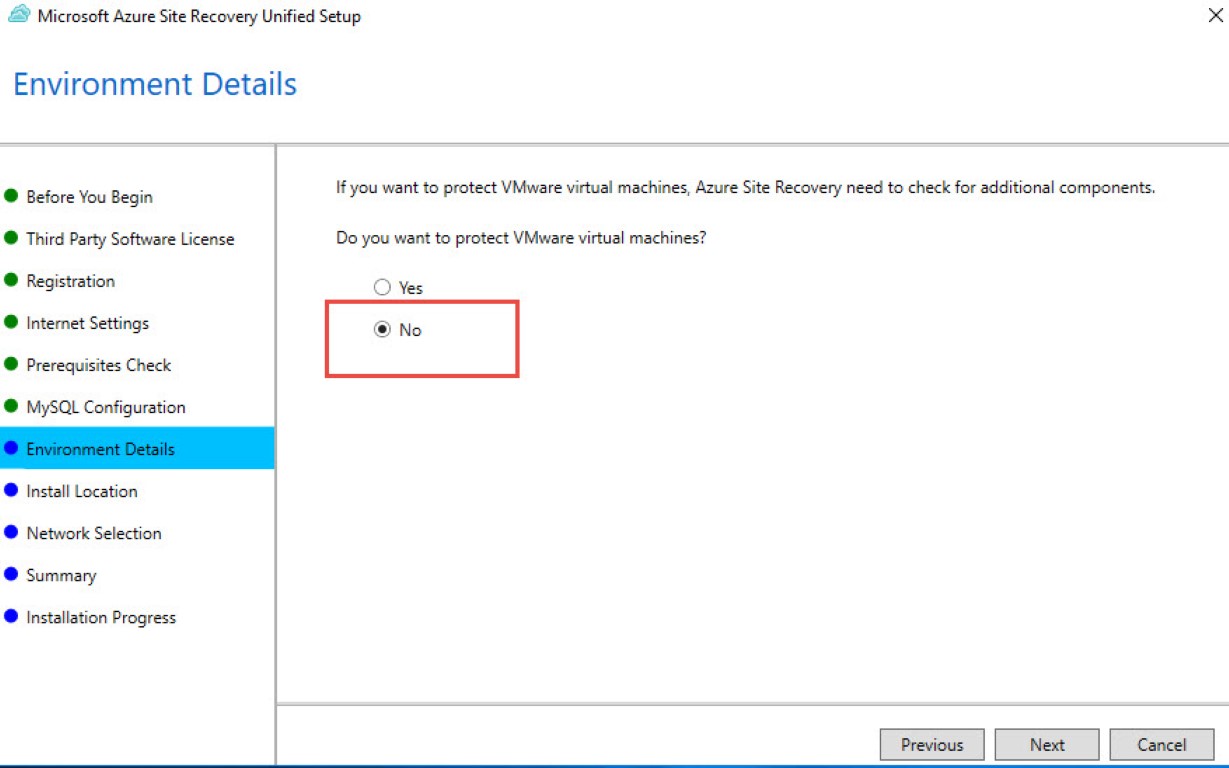
In Environment Details, select No if you’re replicating Azure Stack VMs or physical servers.
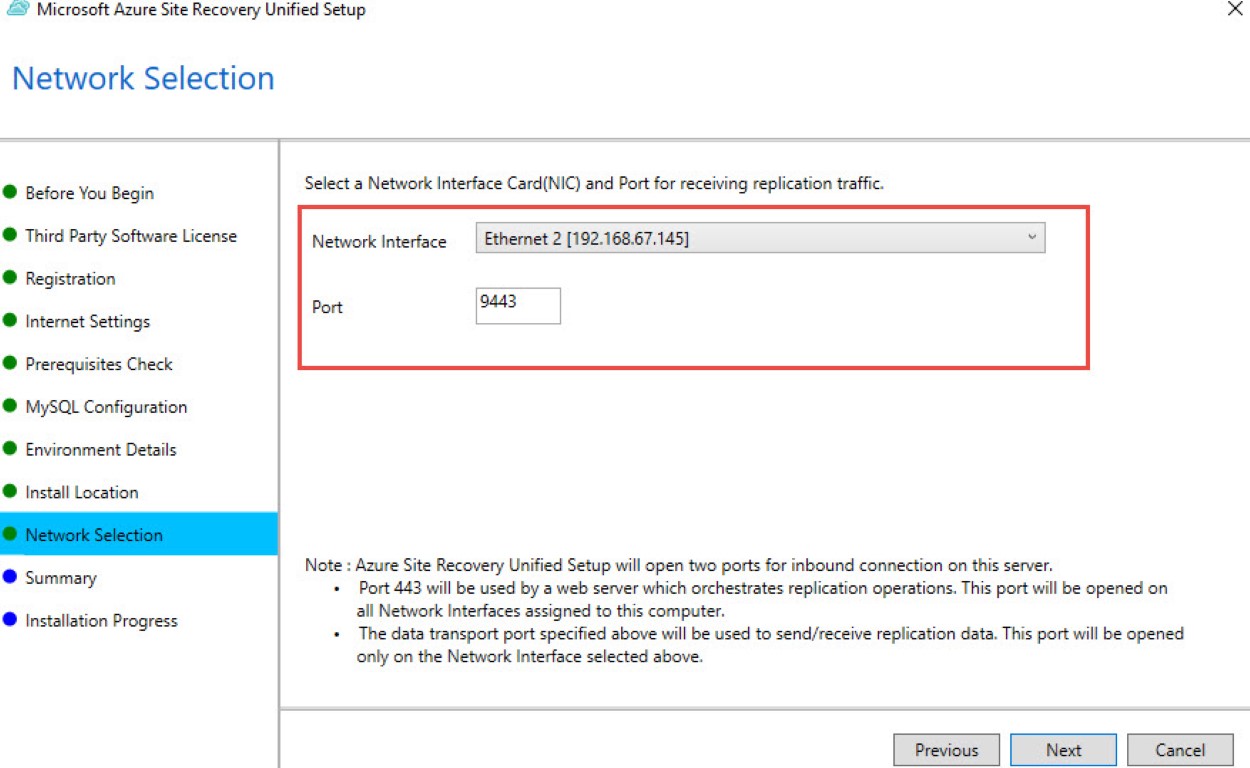
In Network Selection, specify the listener (network adapter and SSL port) on which the configuration server sends and receives replication data. Port 9443 is the default port used for sending and receiving replication traffic.
In addition to the port 9443, also we need to open port 443, which is used by a web server to orchestrate replication operations.
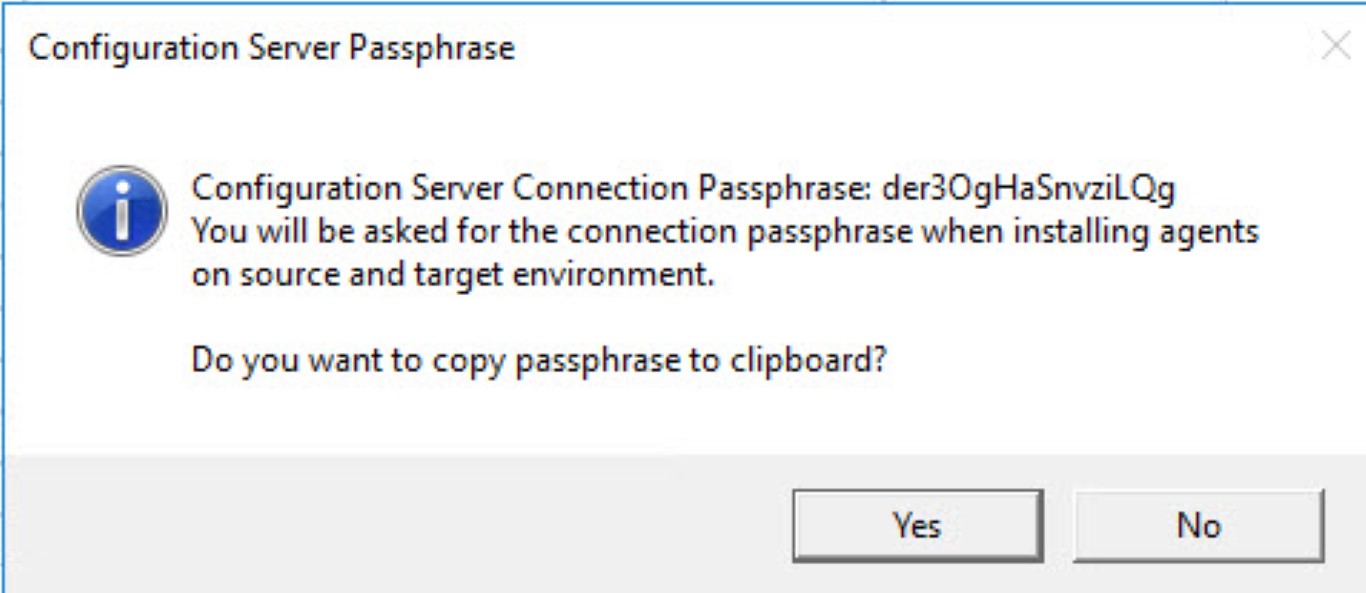
n Summary, review the information and click Install. When installation finishes, a passphrase is generated. You will need this when you enable replication, so copy it and keep it in a secure location.

On End of Installation, setup will show Microsoft Azure Site Recovery Configuration Server settings.
Open Managed Account tab and add account what you created earlier.
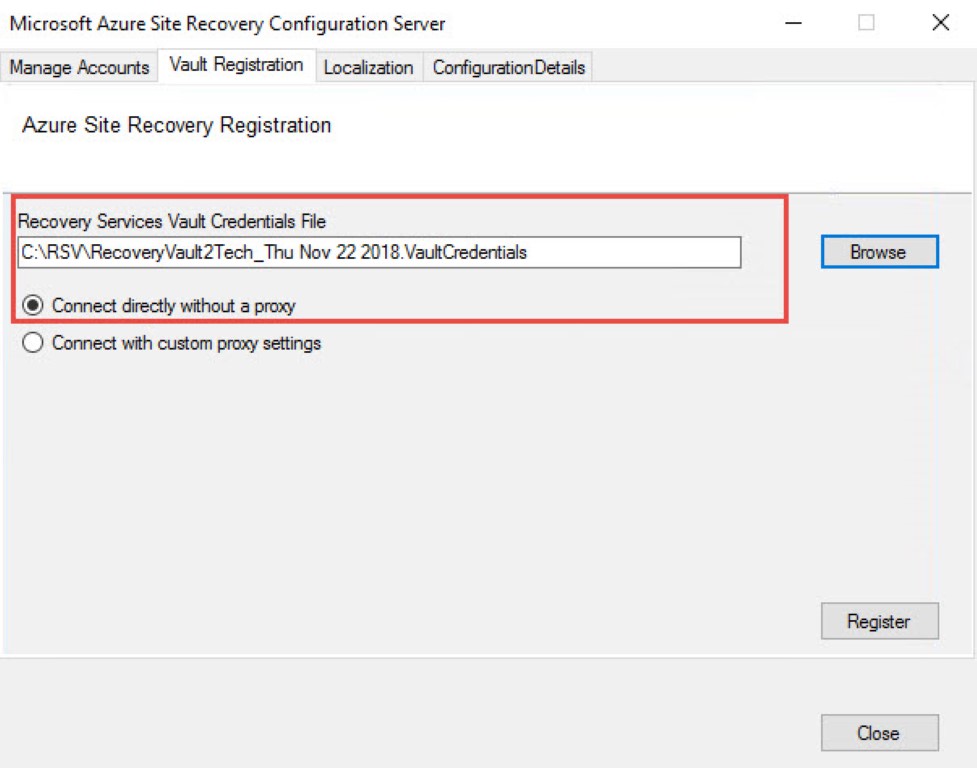
Open Vault Registration and pick up Vault Credentials File.
Creating replication policy and configuring replication to Azure
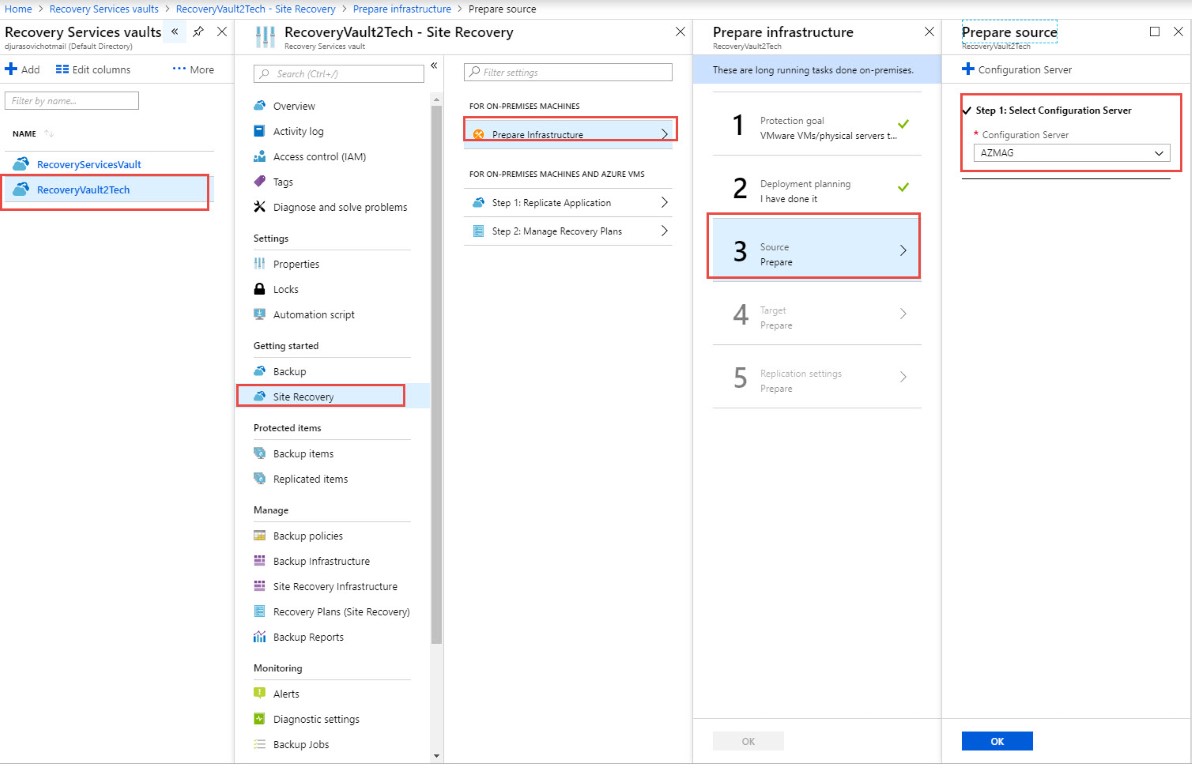
In the Azure portal, navigate Recovery Services vault > Site Recovery > Prepare Infrastructure > 3 Source Prepare
Select Configuration Server you just configured in the previous step
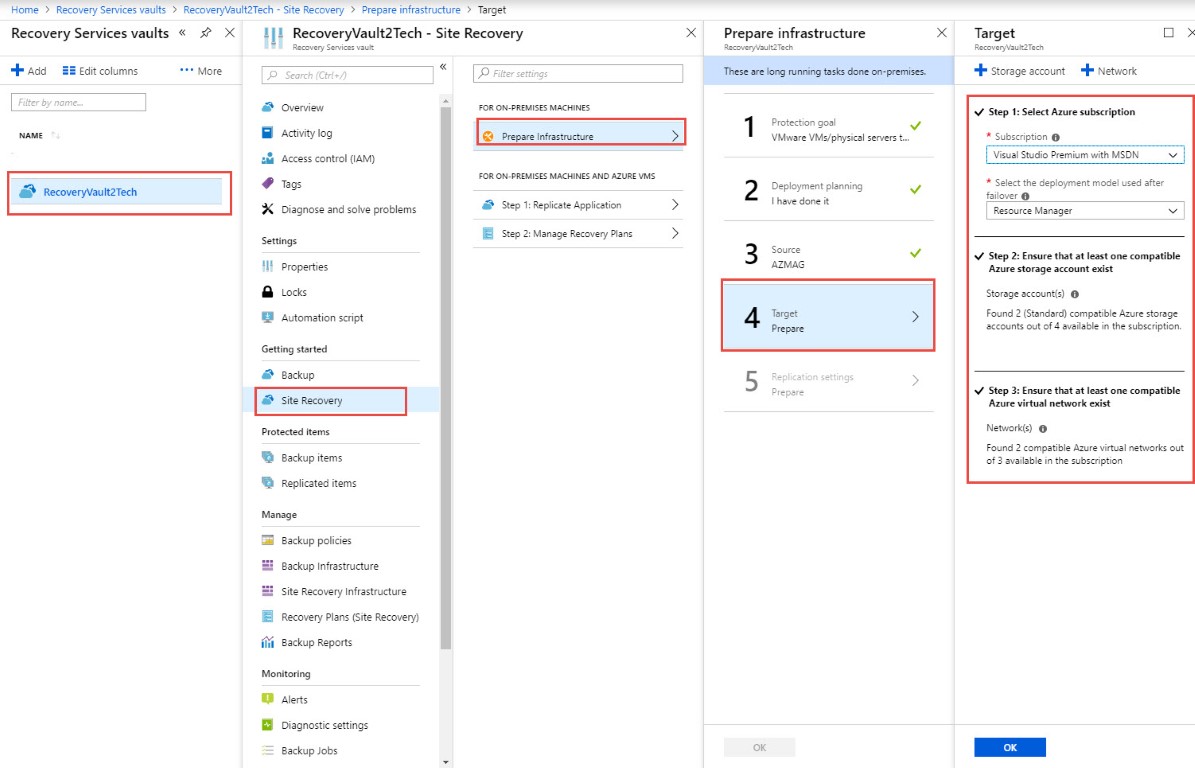
In the Azure portal, navigate Recovery Services vault > Site Recovery > Prepare Infrastructure > 4 Target Prepare
Select Azure Subscription, Azure Storage Account and Azure Virtual Network you created in previous steps.
Click OK
Create a Replication Policy
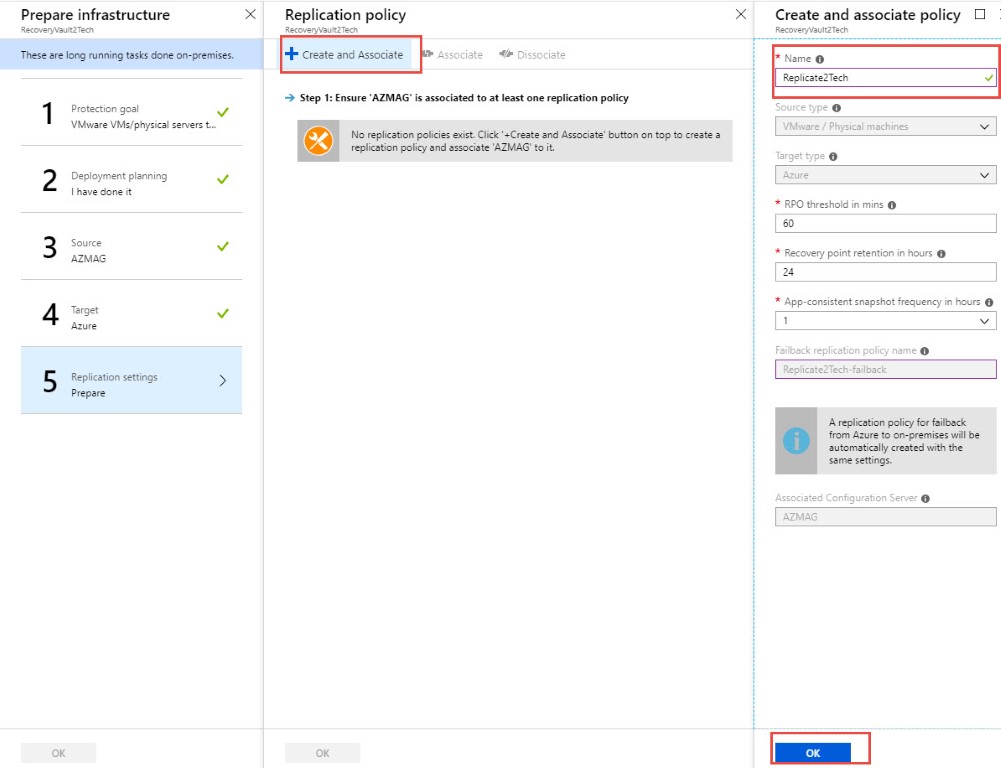
In the Azure portal, navigate Recovery Services vault > Site Recovery > Prepare Infrastructure > 5 Replication Settings – Replicate
Click Create and Associate
Enter a name for Replication Policy
Press OK
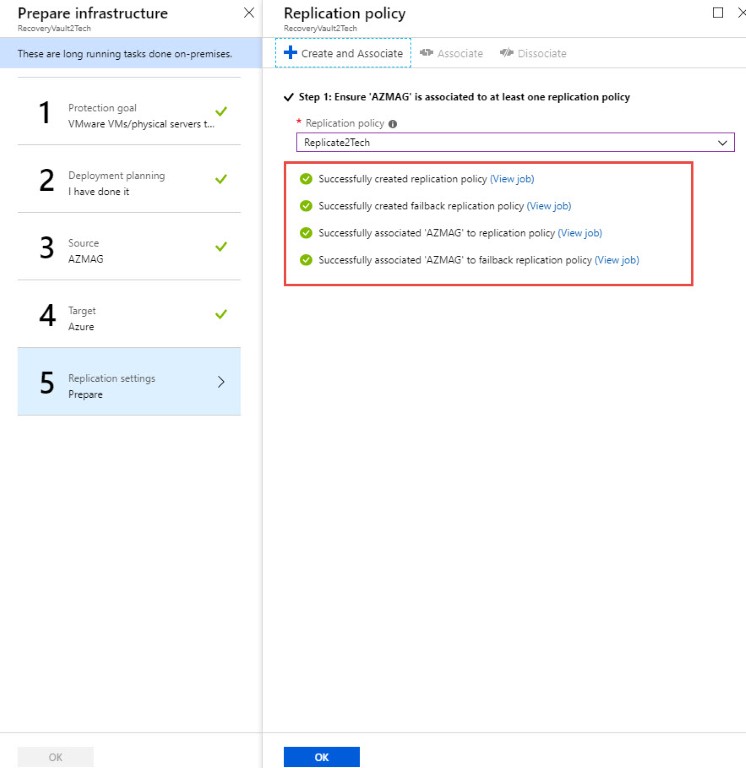
You will see the result of Replication Policy Creation
Enable Replication
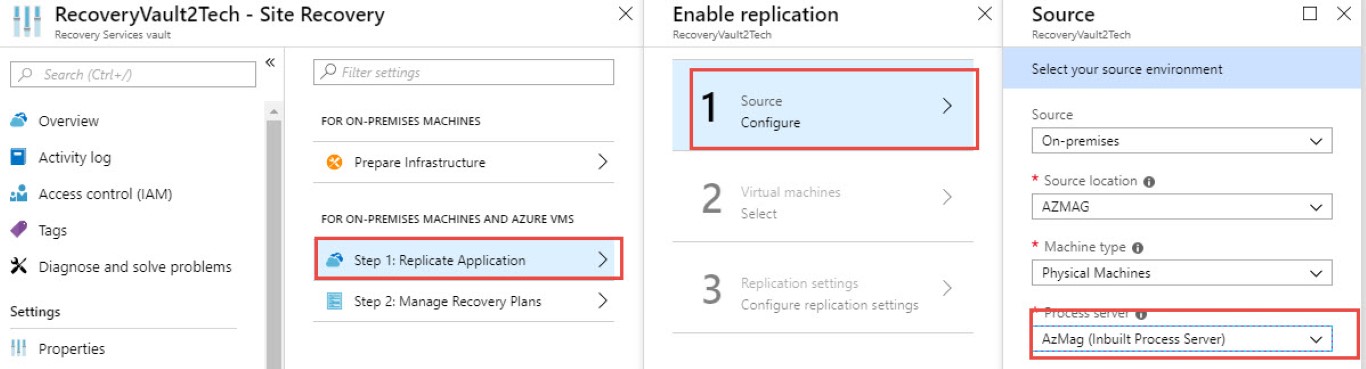
In the Azure portal, navigate Recovery Services vault > Site Recovery > Step 1 Replicate Applications > 1 Source Configure
For source, location pick up you on-premises configuration/processing server
Enter a name for Replication Policy
Press OK
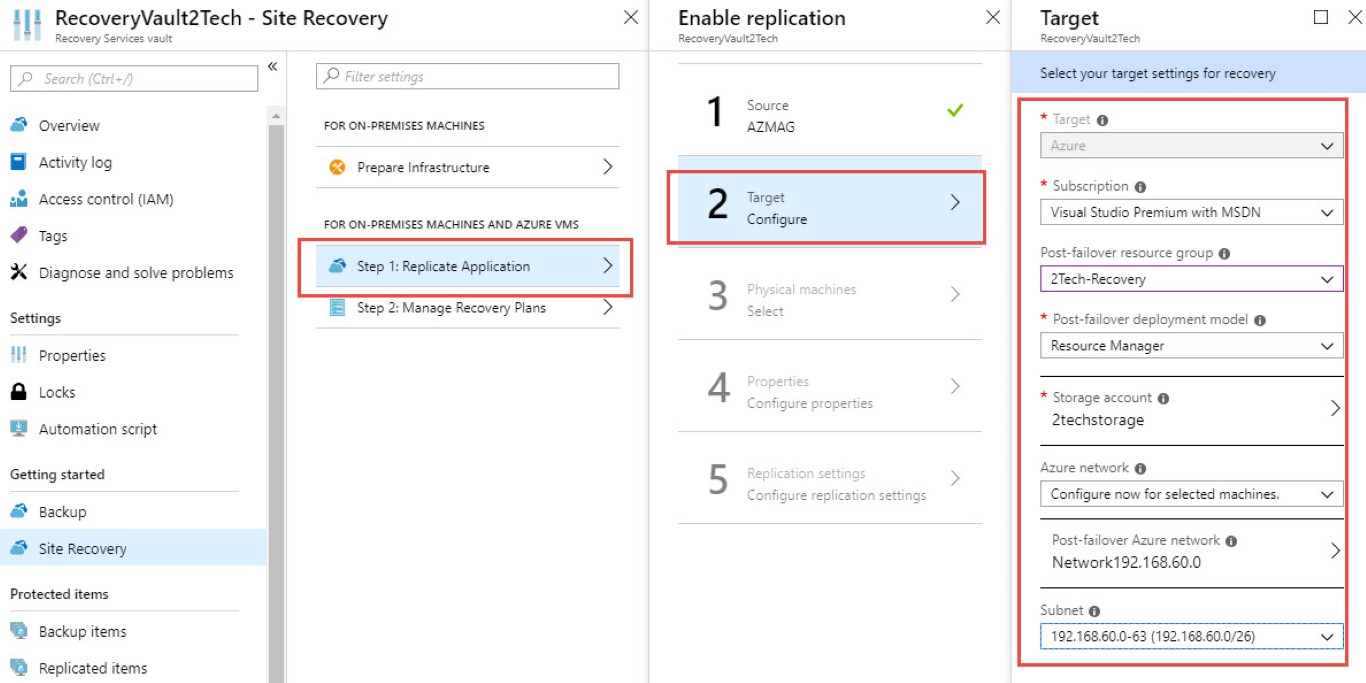
In the Azure portal, navigate Recovery Services vault > Site Recovery > Step 1 Replicate Applications > 2 Target Configure
Configure Target Settings from the following figure.
Press OK
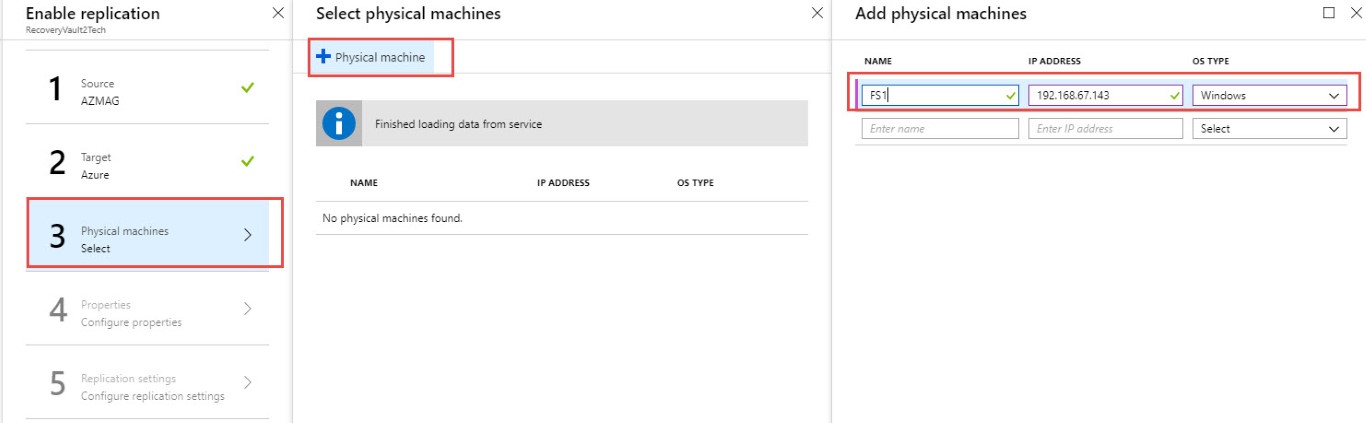
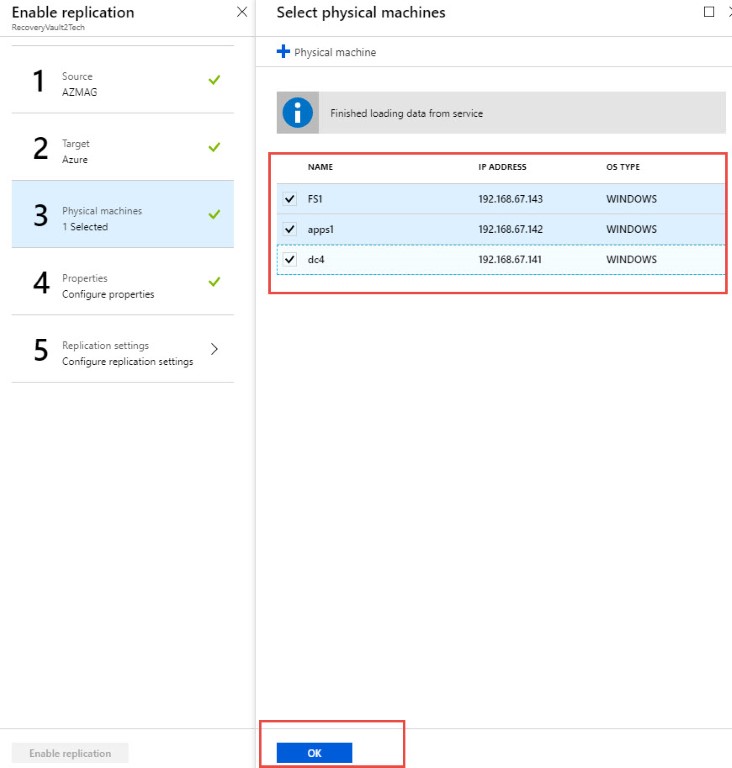
In the Azure portal, navigate Recovery Services vault > Site Recovery > Step 1 Replicate Applications > 3 Physical Machines.
Click + Physical machine and add server name IP address and OS Type for each server you want to replicate
Press OK
We added three servers in our configurations
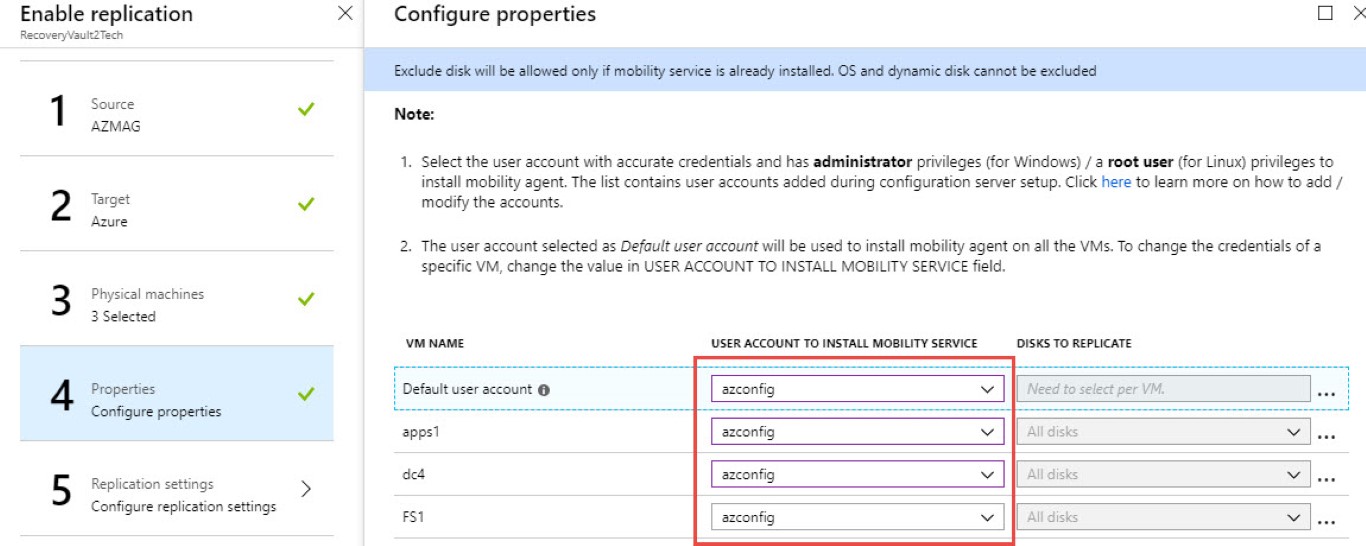
In the Azure portal, navigate Recovery Services vault > Site Recovery > Step 1 Replicate Applications > 4 Properties.
For each Physical server select user account, you created in previous steps. This account will be used to install mobility services on all servers.
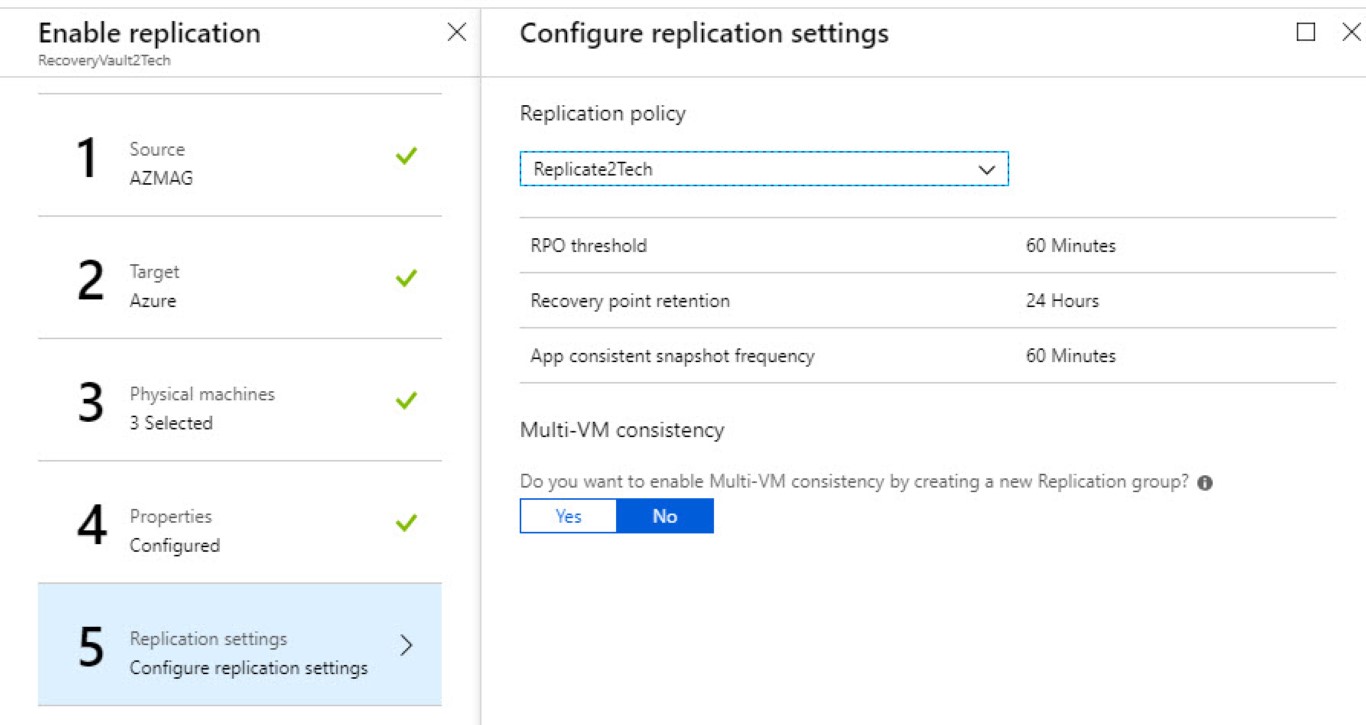
In the Azure portal, navigate Recovery Services vault > Site Recovery > Step 1 Replicate Applications > 5 Replication Settings
For each Physical server select user account, you created in previous steps. This account will be used to install mobility services on all servers.
In RPO threshold, specify the RPO limit. Alerts are generated when continuous replication exceeds this limit.
In Recovery point retention, specify (in hours) the duration of the retention window for each recovery point. Protected machines can be recovered to any point within a retention window. Up to 24 hours of retention is supported for machines replicated to premium storage. It is up to 72 hours is supported for standard storage.
In App-consistent snapshot frequency, specify how often (in minutes) recovery points that contain application-consistent snapshots will be created.
Manually Install Mobility Services
In case that configuration server is unable to install mobility services on another server, you can install manually following the links.
Install the Mobility service manually on physical servers
Monitoring and Fine Tuning Replication
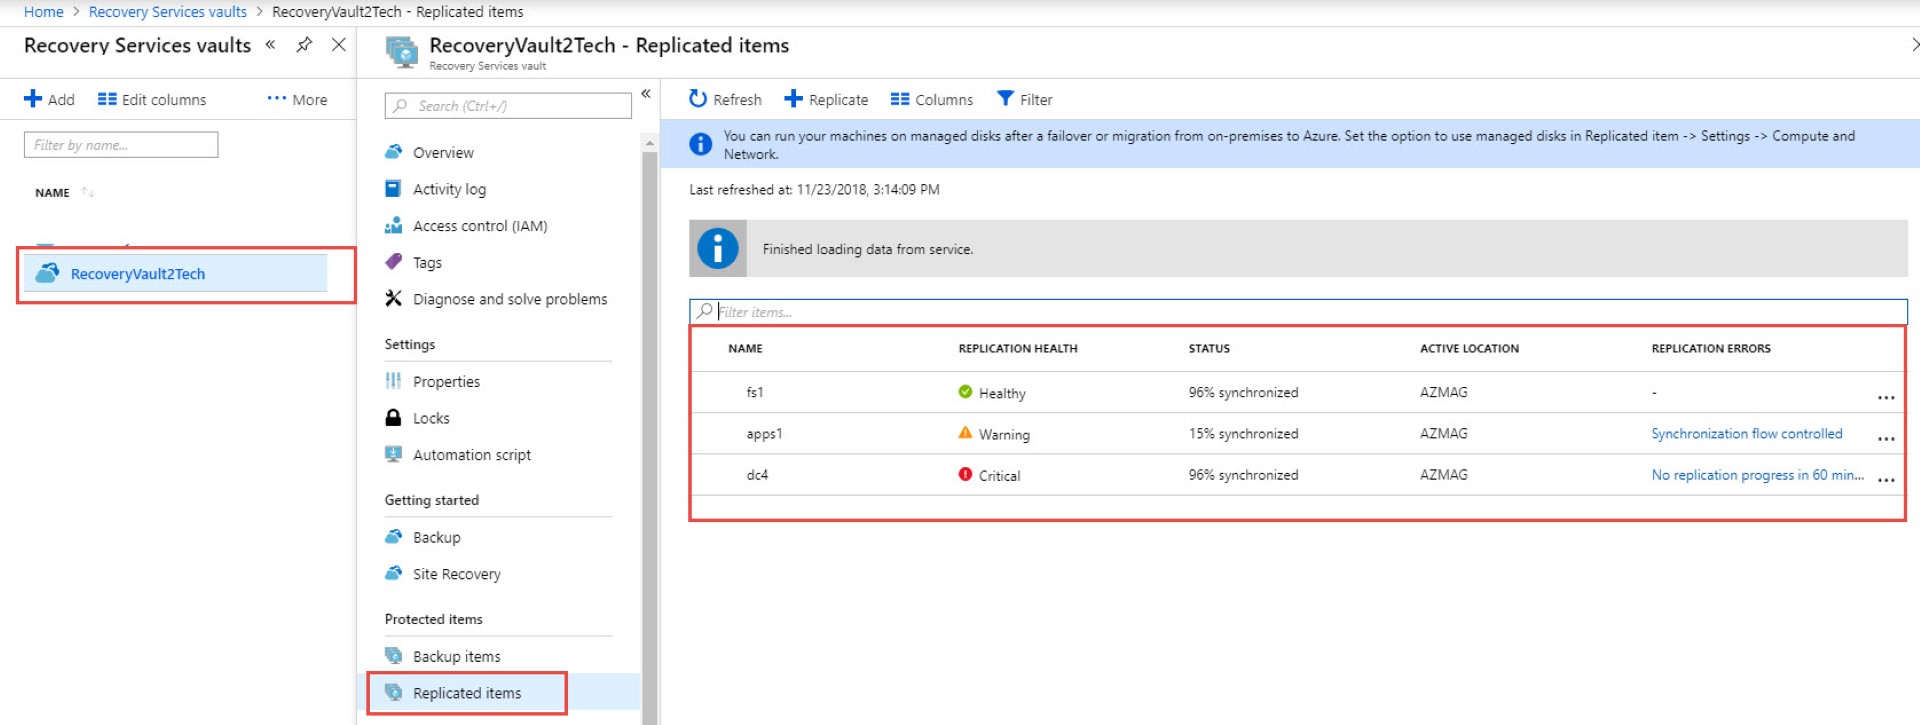
In the Azure portal, navigate Recovery Services vault > Replicated Items
You will see replication status for all replicated servers.
Tuning Replication Traffic
Log on to on-premises configuration server
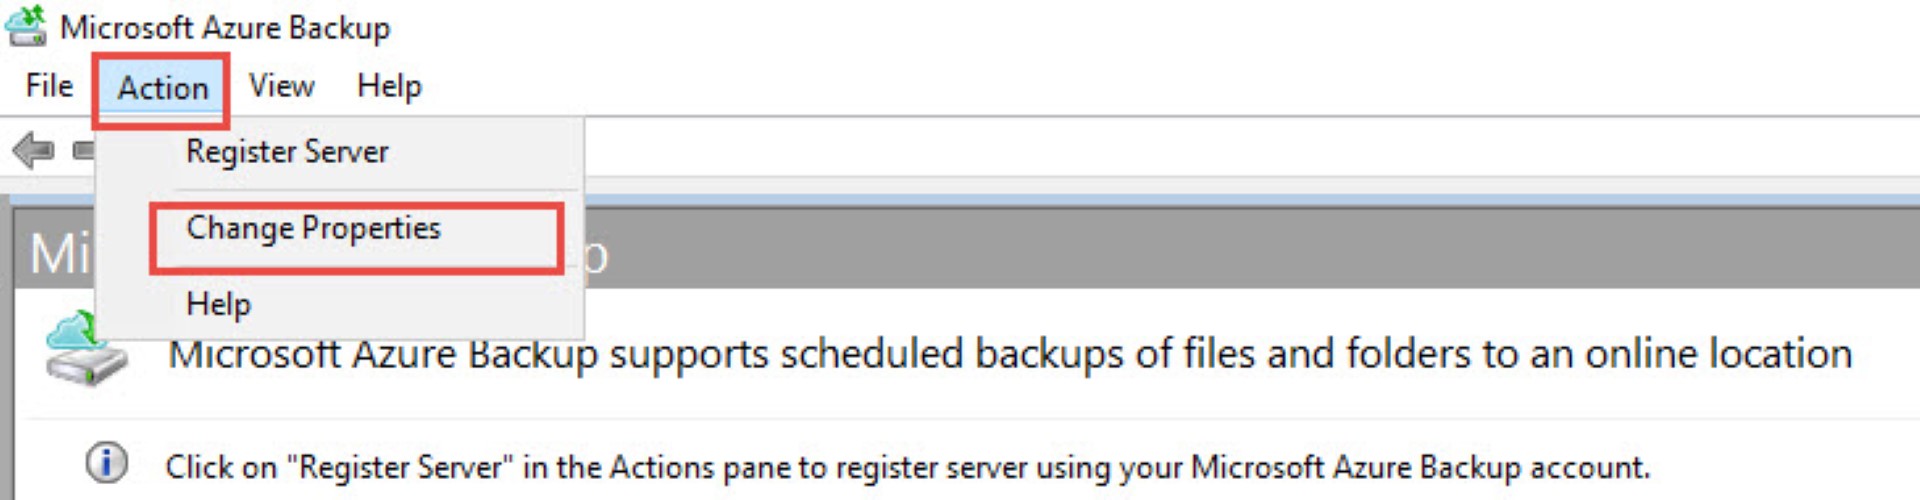
Run Microsoft Azure Backup from the desktop.
Navigate to Actions/ Change Properties
Visit the third tab and you will be able to configure bandwidth used for replication.
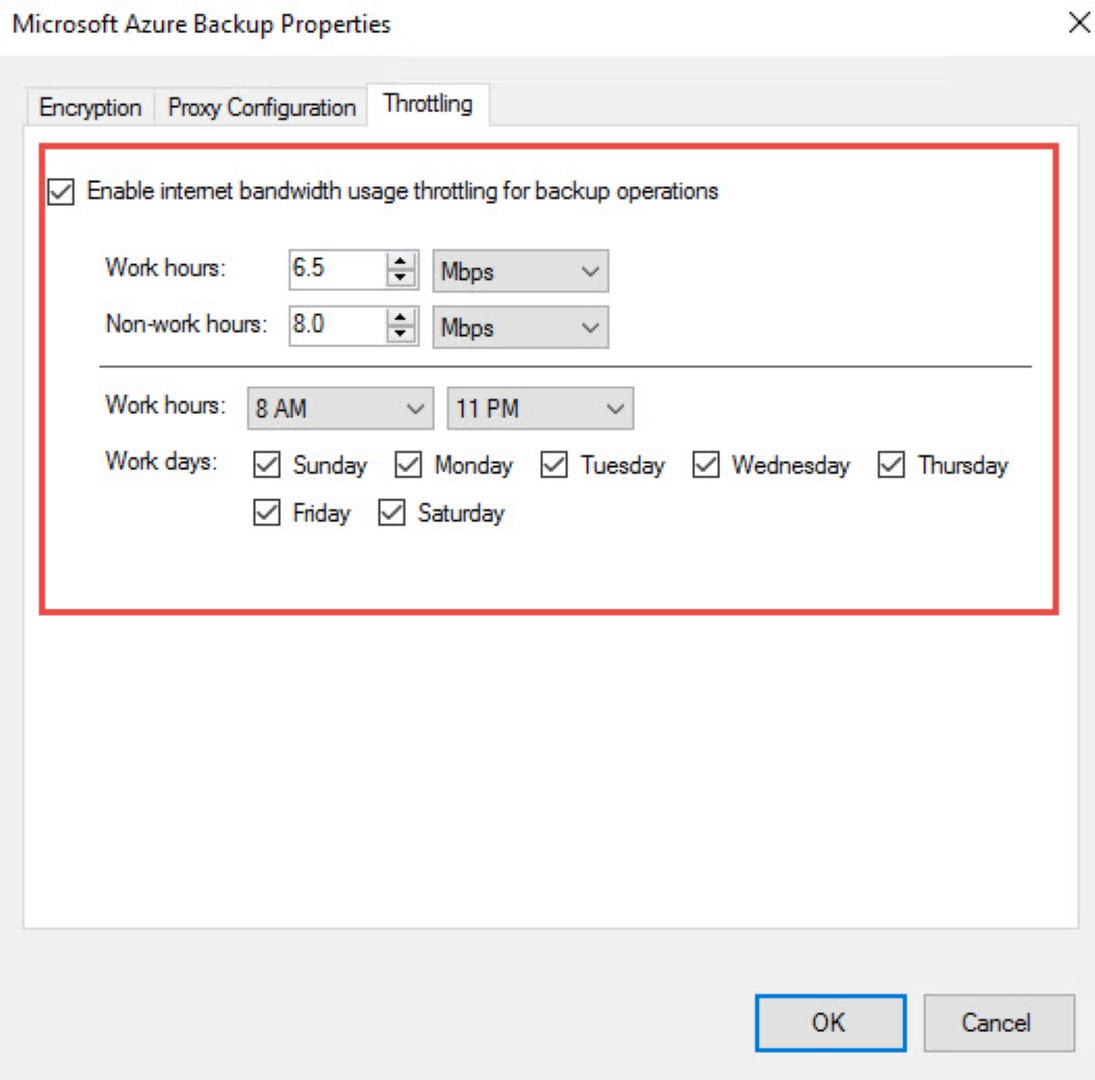
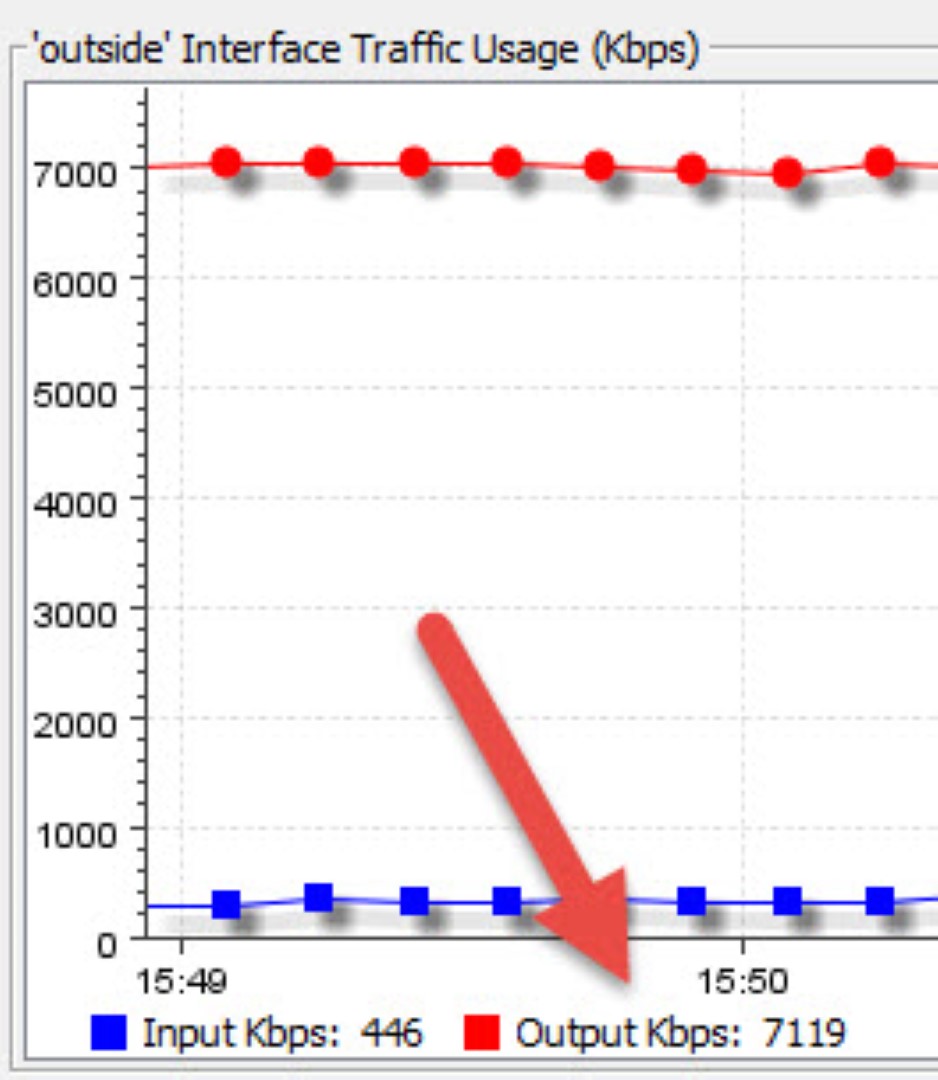
Azure Network is very powerful and it will use all of your resources as you can see from PIX traffic Usage Monitor>
You will really need to access this settings.
In the next article http://2tech.ca/set-up-disaster-recovery-for-physical-on-premises-vms-to-azure-using-backup-and-site-recovery-oms-services-part2/, we will show you how to activate replicated VM in Azure.
/Dan Djurasovic
Ottawa, Dec 2018