
CIS Benchmarks are the best-practice security configuration guides both developed by the Center for Internet Security.
They and accepted by the government, business and industry.
The CIS Benchmarks are distributed free of charge in PDF format.
https://learn.cisecurity.org/benchmarks
You can follow the configuration from the PDF file and configure all settings manually.
The better option is to purchase a CIS membership. Paid membership will give you access to the already configured build kit.
CIS Securesuite Build Kit
We will be covering Build Kit for Windows 2016 in this article.
After you download the Build kit and unzip the file, you will see a directory structure as those picture shows.
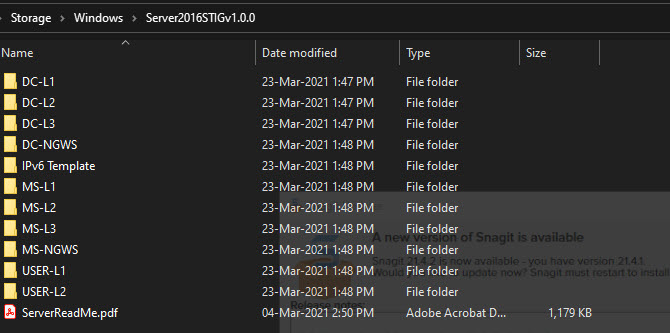
When you dig deeper under folders, you will see regular Windows GPO templates.

At this moment we are interested in applying the CIS benchmark on standalone windows VMs hosted in Azure.
For this demonstration, we will secure Windows Member Server with Level 1 Profile.
We will used GPOs from the following folders.
User-L1 (Users GPO)
MS-L1 (Machine GPO)
Login to your VM and execute commands as per instructions from CIS instruction which came with the kit.
We can use lgpo.exe utility to apply the following GPOs to the local users and computer settings.
C:\CIS\Windows\lgpo.exe /q /g “C:\CIS\Windows\Server2016STIGv1.0.0\USER-L1\{C604B8EE-4A38-42D3-B9E8-04DEF9F8A7C6}”}
C:\CIS\Windows\lgpo.exe /q /g “C:\CIS\Windows\Server2016STIGv1.0.0\MS-L1\{898B400C-901F-4809-9F04-631305853570}”}
Now after you executed those two policies, you can not log in to your Azure VM at all. What is a issue?
The issue is that CIS provides all these build kits only for the standard servers when you can log in on console only, not through RDP.
Here is a list of issues that the original CIS GPO blocks you from login into Azure VM.
- Deny admin login through network
- Rename your admin account to CISADMIN
- Diable Local Firewall Rules and local connection rules under Public Profile
To remedy this problem we need to create a reverse GPO which will reverse some of the settings from those GPOs after the original GPO has been applied.
We will need access to regular Windows Domain Controllers to create a reverse policy.
You can spin up the controller with any name in azure tenant and use them only for the creation of this reverse GPO.
Use Group Policy Management tool on Active Directory server. Just create empty OU and create MS-L1-Reverse GPO attached to that OU
This is the content of the MS-L1-Reverse GPO policy which needs to be executed after CIS policies are run.
| Computer Configuration\Policies\Windows Settings\Security Settings\Local Policies\User Rights Assignment | |
| Deny access to this computer from the network BUILTIN\Guests | BUILTIN\Guest |
| Deny log on through Terminal Services BUILTIN\Guest | BUILTIN\Guest |
| Computer Configuration\Policies\Windows Settings\Security Settings\Local Policies\Security Options | |
| Accounts: Administrator account status | Enabled |
| Accounts: Rename administrator account | CloudAdmin |
| Accounts: Rename guest account | CloudGuest |
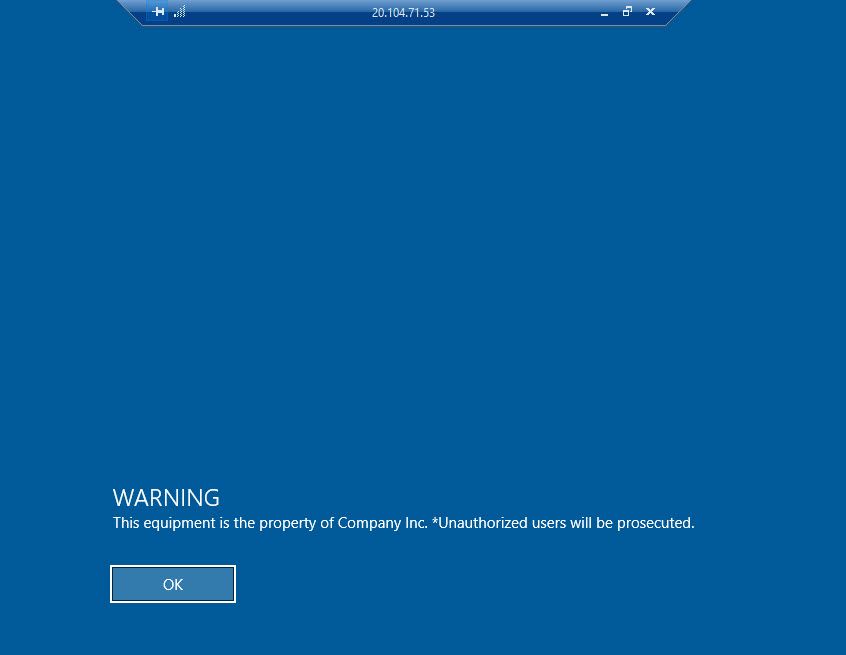
| Interactive logon: Message text for users attempting to log on | Unauthorized users will be prosecuted. |
| Interactive logon: Message title for users attempting to log on | WARNING |
| Computer Configuration (Enabled)\Policies\Windows Settings\Security Settings\Windows Firewall with Advanced Security\Public Profile Settings | |
| Apply local firewall rules | YES |
| Apply local connection security rules | YES |
After you finished populating GPO objects navigate to Group Policy Objects, highlight MS-L1-Reverse policy, right-click on MS-L1-Reverse policy, select Back-Up and backup GPO to the MS-L1-Reverse directory.
Now folder structure should look like this
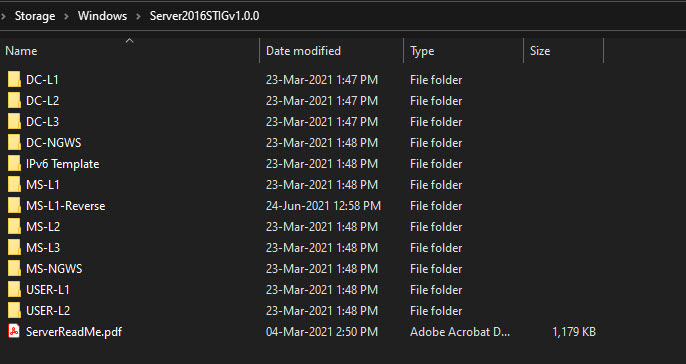
Zip content of Windows folder to Server2016STIGv1.0.0.zip file

We need to distribute the payload to all VMs we have.
We will create a generic storage account, upload a zip file there and distribute it to VMs using Run Command from Azure.
Create a Generic Storage account with default settings
Create a container in a storage account and name it CIS, and assign Public Access Tier to be Blob Anonymous (Read Access Only)

Navigate to your CIS container and upload your zip file
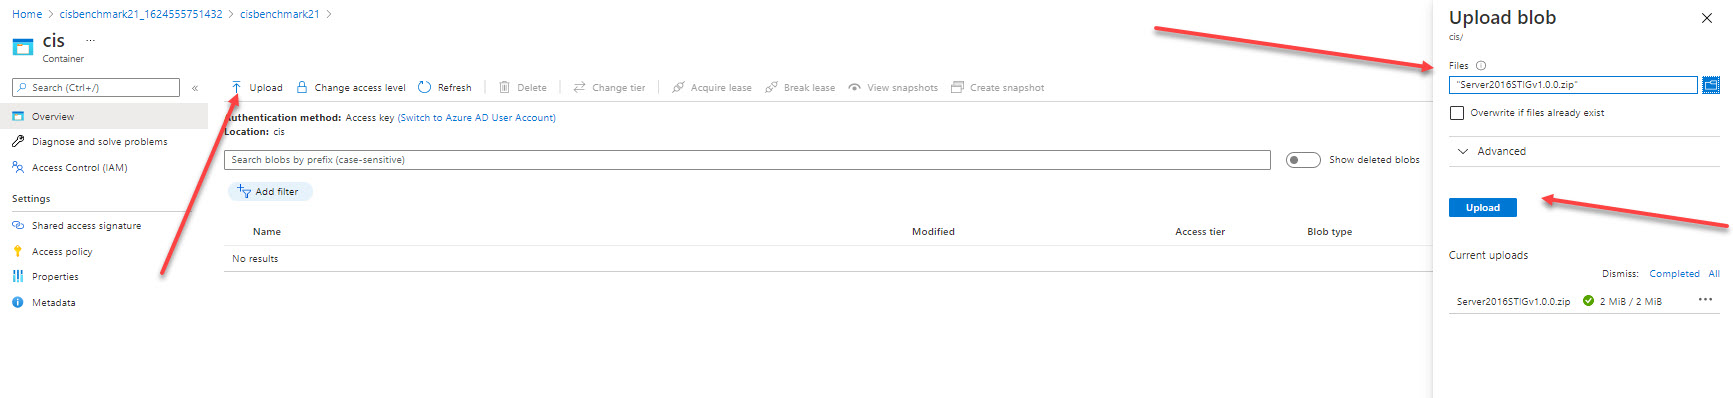
After the file is uploaded, navigate to the file and copy the URL.
Paste URL in the browser and see if the file can be downloaded to your workstation.
This is an example of the URL we were using.
https://cisbenchmark21.blob.core.windows.net/cis/Server2016STIGv1.0.0.zip

We will be using Run Command Feature in Azure VM to deeply this CIS benchmark-setting to VM
The following script will :
- Create C:\CIS folder on the VM
- Force use of TLS1.2 during download
- Download Server2016STIGv1.0.0.zip file to C:\CIS folder
- Extract the zip file to C:\CIS\Server2016STIGv1.0.0 folder
- Import User-based GPO under USER-L1 folder
- Import Computer-based GPO under MS-L1 folder
- Import Computer-based GPO under MS-L1-Reverse folder
Paste the following script to Run Command on your windows 2016 VM
You will need to replace GPO ID {A7807769-242A-4A50-9F82-DF3EE522ACAD}”} with your GPO which you will picked up under the MS-L1-Reverse folder
# CIS Server2016STIGv1.0.0 Benchmark, Standalone Windows 2016 Server
New-Item -Path “c:\CIS” -ItemType directory
[Net.ServicePointManager]::SecurityProtocol = [Net.SecurityProtocolType]::Tls12
Invoke-WebRequest -Uri “https://cisbenchmark21.blob.core.windows.net/cis/Server2016STIGv1.0.0.zip” -OutFile “c:\cis\Server2016STIGv1.0.0.zip”
Expand-Archive -LiteralPath “c:\CIS\Server2016STIGv1.0.0.zip” -DestinationPath C:\CIS
Invoke-Command -ScriptBlock {C:\CIS\Windows\lgpo.exe /q /g “C:\CIS\Windows\Server2016STIGv1.0.0\USER-L1\{C604B8EE-4A38-42D3-B9E8-04DEF9F8A7C6}”}
Invoke-Command -ScriptBlock {C:\CIS\Windows\lgpo.exe /q /g “C:\CIS\Windows\Server2016STIGv1.0.0\MS-L1\{898B400C-901F-4809-9F04-631305853570}”}
Invoke-Command -ScriptBlock {C:\CIS\Windows\lgpo.exe /q /g “C:\CIS\Windows\Server2016STIGv1.0.0\MS-L1-Reverse\{A7807769-242A-4A50-9F82-DF3EE522ACAD}”}
Write-Output “All CIS Benchmark Scripts applied successfully”
After a couple minutes, settings is applied as you can see from the following pictures 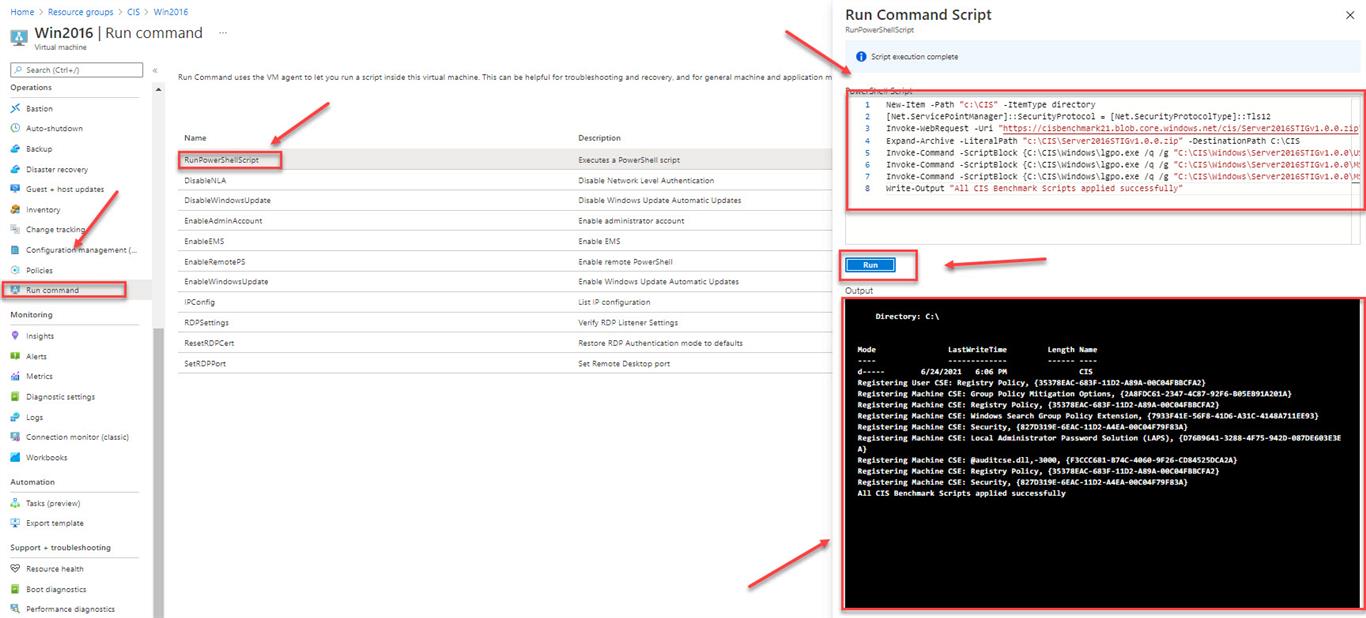
Now when we log in, we will need to use CISADMIN account and disclaimer what we set up is presented.
There is also an option to run CIS Benchmark on multiple systems using Invoke-AzVMRunCommand.
Here is an example
Invoke-AzVMRunCommand -ResourceGroupName ”RGTEST” -Name ”VM1″ -CommandId ‘RunPowerShellScript’ -ScriptPath ”C:\script.ps1″
Great article. Super thanks for sharing this with the community. I can’t appreciate enough for this as it has taken a lot of my time and effort to identify what changes caused my RDP session disconnects in Azure environment. Thank you again for your efforts and time in putting this blog together. Please continue your awesome work!